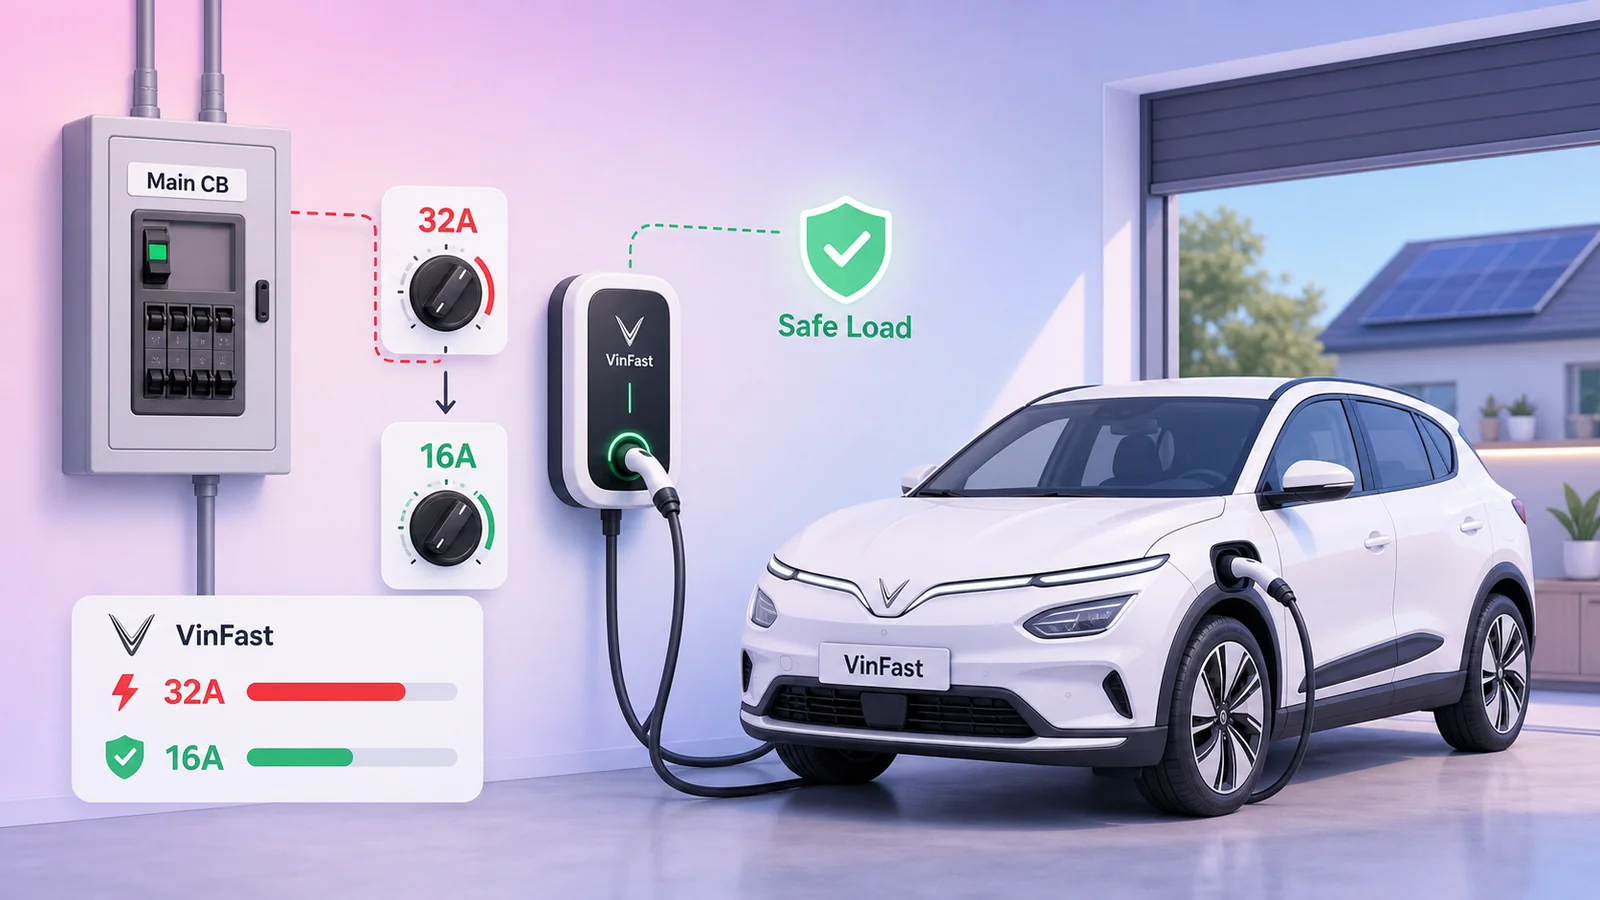
Limiting VinFast Home Charger Current To Avoid Main Breaker Overload
When a 7kW EV charger pulls 32A continuously, the household load can exceed the main breaker. On a VinFast Home Charger, the rotary current selector can be used to limit charging current, for example to 16A.
An EV charger installed at home is often the largest load that runs continuously for hours. With a single-phase 7kW AC charger, charging at the maximum 32A can draw roughly 7.36kW at 230V. Add air conditioners, an induction stove, a water heater, refrigerator, pump, or other household loads, and the total load can exceed the home electrical capacity and trip the main breaker.
If you do not need maximum charging speed every day, reducing the charging current is a practical way to reduce stress on the electrical system. On the VinFast Home Charger 7kW/7.6kW, this can be done with the internal rotary switch / current selector.
Why Limit Charging Current?
Using the simple formula P = U x I:
| Charging current | Approx. power at 230V | Practical meaning |
|---|---|---|
| 32A | ~7.36 kW | Faster charging, but a very large continuous household load |
| 16A | ~3.68 kW | Slower charging, but roughly half the instantaneous load |
For overnight charging, maximum charger output is often unnecessary. If the car stays at home for many hours, 16A can still be practical for daily use while significantly reducing the chance of overloading the main breaker.
Current limiting does not replace proper electrical design. The charger feeder cable, branch breaker, RCD/RCBO, grounding, terminals, wire size, and torque must still be correct. But if the home electrical system has limited capacity, lowering the charge current is a useful operating safeguard.
Confirm The Charger Model
This article applies to chargers labeled VINFAST HOME CHARGER, model AC0070EN02565, rated for single-phase 230V AC, maximum 32A / 7kW.
The important part is not to use the wrong selector table. Some generic VinFast Home Charger manuals show a different table, such as Position 1 = 16A, Position 2 = 24A, Position 3 = 32A. For VinFast Home Charger, use the model-specific table.
On VinFast Home Charger, if the target is 16A, the correct selector position is:
Position 2 = 16A
Do not use Position 1 for a 16A target on this table. For VinFast Home Charger, Position 1 is 12A.
VinFast Home Charger Current Selector Table
The power values below are estimated at 230V:
| Position | Current | Approx. power at 230V | Note |
|---|---|---|---|
| 0 | 32A | ~7.36 kW | Maximum for the model |
| 1 | 12A | ~2.76 kW | Slow / light load |
| 2 | 16A | ~3.68 kW | Useful target for reducing load |
| 3 | 20A | ~4.60 kW | Medium |
| 4 | 24A | ~5.52 kW | Medium-high |
| 5 | 28A | ~6.44 kW | Near maximum |
| 6 | 32A | ~7.36 kW | Maximum |
| 7 | 32A | ~7.36 kW | Maximum |
| 8 | 32A | ~7.36 kW | Maximum |
| 9 | 32A | ~7.36 kW | Maximum |
| A-F if present | 32A | ~7.36 kW | Maximum |
One detail is easy to misunderstand: if the dial is at 0, that does not mean "unlimited". In the VinFast Home Charger table, 0 is still the model's maximum current limit: 32A.
Where The Rotary Switch Is
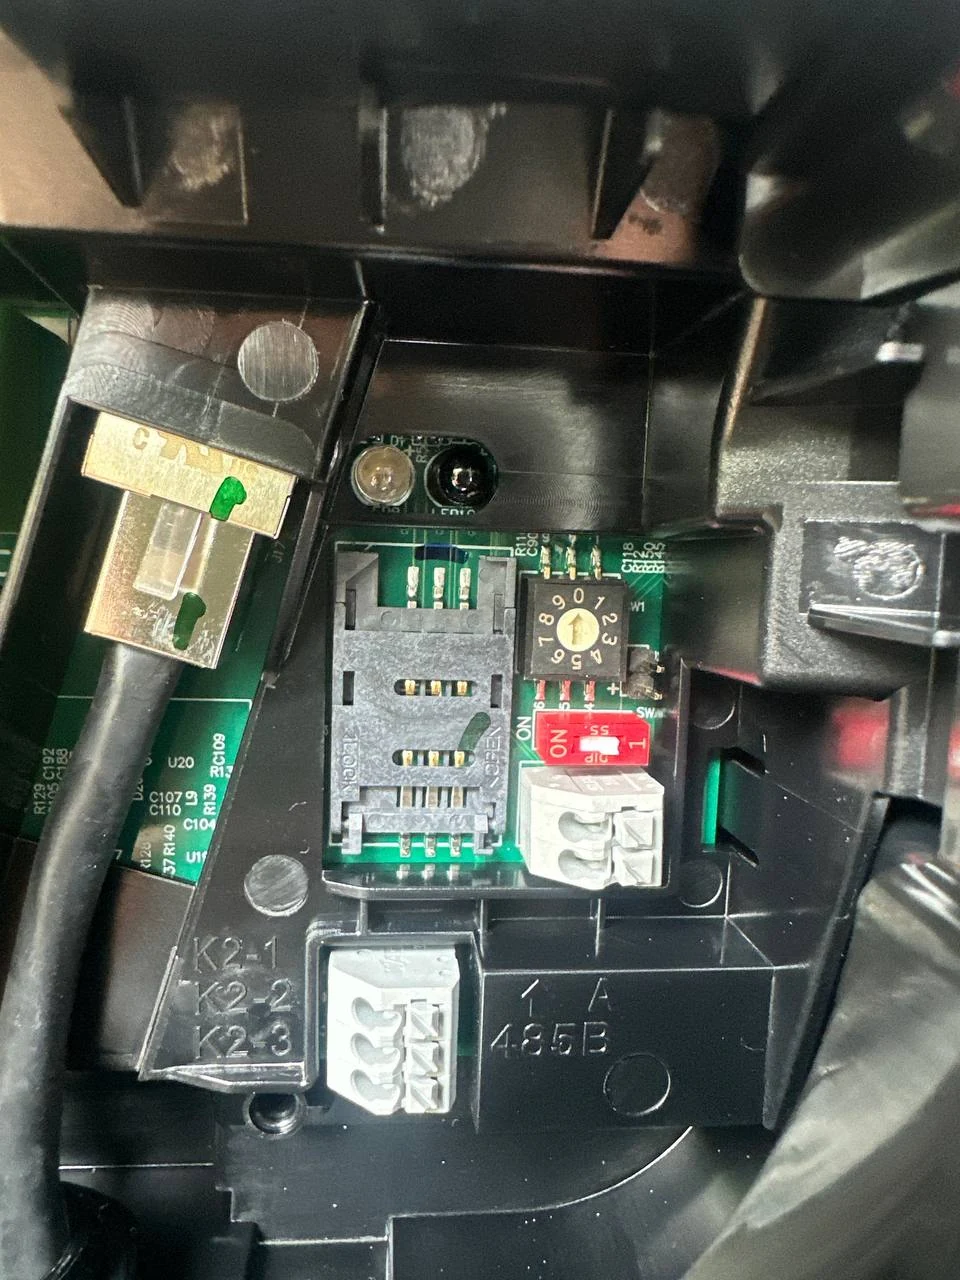
In the VinFast Home Charger manual, the control is labeled Rotary switch. It sits on the right-side control board area, near the SIM slot and RS485 interface, and has a small slot for a flat-head screwdriver.
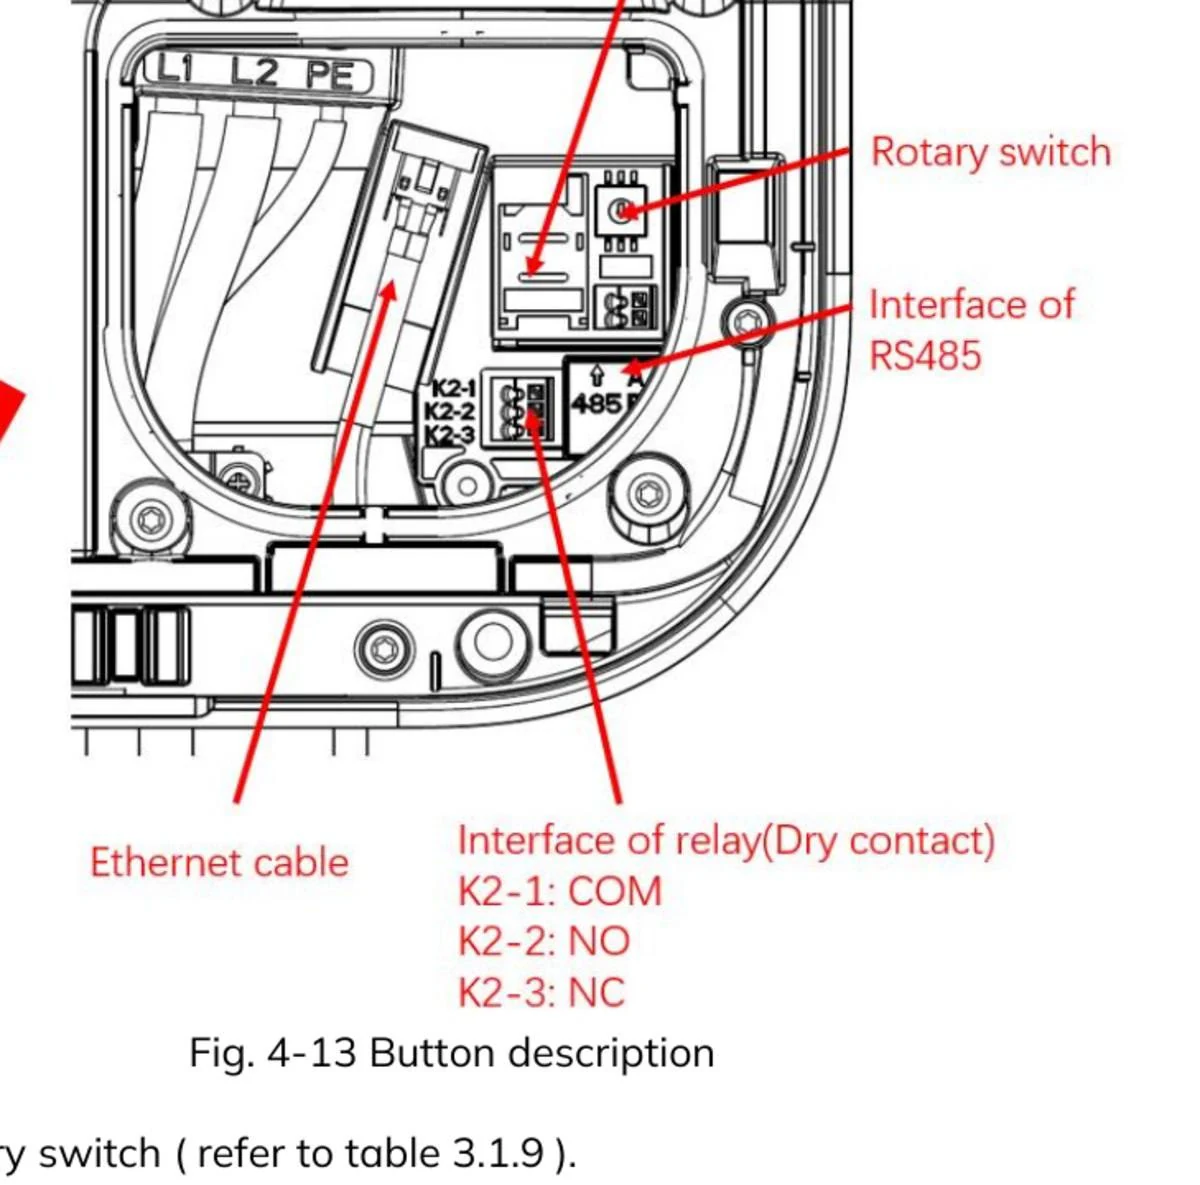
In the real charger photo, the black/yellow rotary dial sits next to the red DIP switch. The dial is marked 0-9; use a flat-head screwdriver to rotate it to the desired position.
How To Set It To 16A
Use a conservative sequence:
- Turn off the breaker feeding the charger.
- Verify that the charger is de-energized, not just that the status light is off.
- Open the charger cover carefully so the gasket/water seal is not damaged.
- Find the rotary switch / current selector.
- Use a flat-head screwdriver to rotate the dial to position 2 for 16A.
- Close the cover carefully and make sure the gasket and screws are seated correctly.
- Restore power to the charger.
- Plug in the car and verify the actual charging current from the car/app/charger if available.
After setting the selector to 16A, maximum charging power should drop to roughly 3.68kW at 230V. Charging time will be longer, but the household load is much easier to control than when the charger continuously pulls 32A.
Should You Use WebConfig Instead?
Some chargers expose WebConfig or internal APIs for reading/writing power settings. In a home installation, however, the physical rotary selector is clearer and easier to verify, especially when you do not have valid admin credentials or do not want to interfere with the provider's backend/OCPP setup.
This article therefore focuses only on the physical selector. Do not brute-force passwords, reset the charger, or modify remote configuration unless you fully understand the operational and warranty impact.
When To Choose A Different Current
16A is a good balance if the goal is to avoid main breaker overload. Other values may fit different electrical systems:
- 12A: for small main breakers, weaker wiring, or homes that often run many large loads at the same time.
- 16A: practical for overnight charging and clearly lower than 32A.
- 20A or 24A: when the electrical system is stronger but you still want headroom for other devices.
- 32A: only when the feeder, breaker, leakage protection, grounding, and household load calculation are all suitable.
If the main breaker trips repeatedly, do not simply install a larger breaker to "solve" it. A tripping breaker is a protection signal. Check total load, wire size, terminals, heat at connection points, grounding, and how large loads are distributed in the house.
Conclusion
For the VinFast Home Charger 7kW/7.6kW, the simplest way to reduce load is to limit current with the rotary switch. To set the charger to 16A, use:
Position 2 = 16A
This makes charging slower, but it reduces instantaneous load from roughly 7.36kW to roughly 3.68kW. For many single-phase homes with multiple high-power appliances, that small adjustment can make EV charging safer and more stable.
References: