Kết nối Solis Inverter vào Home Assistant và dùng dự báo thời tiết để tối ưu điện mặt trời
Dựng dashboard Solis Inverter trong Home Assistant để theo dõi điện mặt trời, lên kế hoạch dùng tải trong ngày và tạo cảnh báo vận hành thông minh.
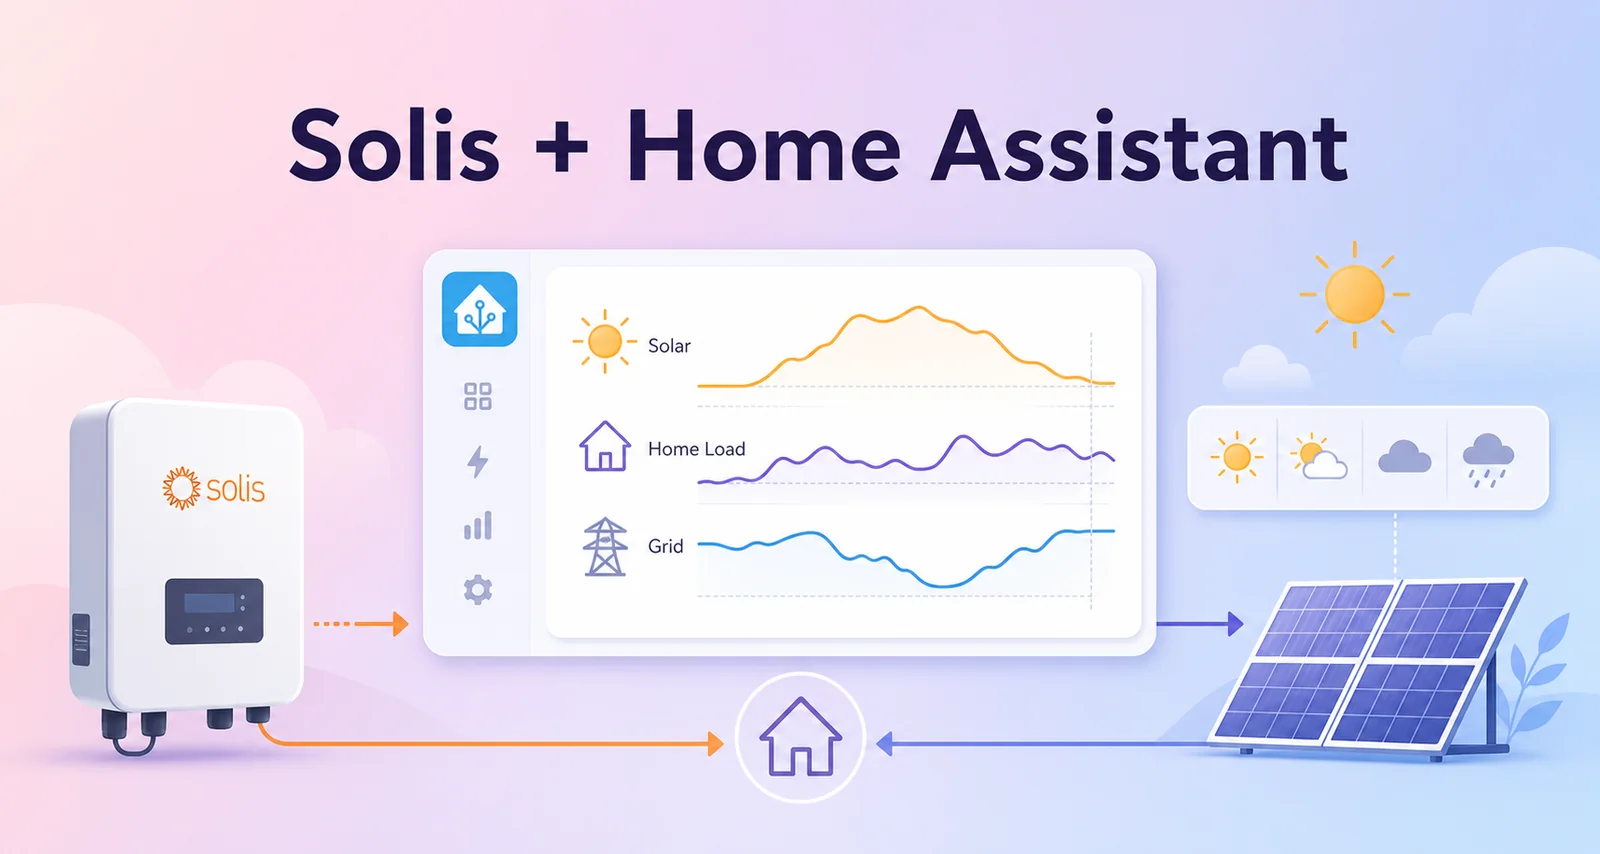
Mình không muốn mở app inverter chỉ để biết hôm nay đang dư nắng hay đang kéo điện từ EVN. Với Home Assistant, mình gom luôn dữ liệu Solis, tải trong nhà, điện lưới và dự báo thời tiết vào cùng một màn hình.
Kết quả là một card nhìn được ngay 3 thứ quan trọng:
- Nhà đang dùng bao nhiêu W
- Điện mặt trời đang tạo ra bao nhiêu W
- Lưới EVN đang bù vào hay hệ đang dư công suất
Ở đây cần tách bạch hai phần. Card và dự báo thời tiết chủ yếu giúp mình nhìn tình hình trong ngày để chủ động kế hoạch: lúc nào nên sạc pin, lúc nào nên dời tải, lúc nào nên hạn chế dùng thiết bị công suất lớn. Automation không nằm ở chuyện "vẽ được card", mà nằm ở các cảm biến phía sau: cảnh báo khi tiêu thụ điện không hiệu quả, nhắc khi đang dư điện để tận dụng, hoặc tự bật quạt làm mát khi inverter Solis quá nóng.
Kiến trúc tổng thể
SolisCloud API
    |
    v
Solis Inverter integration
    |
    v
Solis sensors trong Home Assistant
    |                         \
    |                          \
    v                           v
Dashboard + dự báo            Cảnh báo / tận dụng dư điện / làm mát inverter
    ^                           ^
    |                           |
weather.openweathermap --------+
    ^
    |
OpenWeatherMap

Automation dựa trên cảm biến
    |
    v
Cảnh báo tải kém hiệu quả / sạc pin / quạt làm mát Solis
Trong cấu hình thực tế của mình, Solis đang đi qua custom integration Solis Inverter, domain solis, phiên bản 4.0.1. Integration này dùng kiểu cloud_polling, tài liệu trỏ về hultenvp/solis-sensor.
Nói đơn giản: Home Assistant lấy số liệu từ SolisCloud, biến chúng thành sensor, rồi Lovelace dùng các sensor đó để vẽ card.
Cài integration Solis
Cách nhanh nhất là cài custom integration Solis qua HACS:
- Vào HACS.
- Thêm repository
https://github.com/hultenvp/solis-sensor. - Chọn category
Integration. - Restart Home Assistant.
- Vào Settings -> Devices & services -> Add integration -> Solis Inverter.
Sau khi kết nối thành công, các entity quan trọng sẽ có dạng:
sensor.solis_power_grid_total_power     # Công suất lưới, W
sensor.solis_total_consumption_power    # Tổng tải đang dùng, W
sensor.solis_ac_output_total_power      # Công suất AC từ điện mặt trời, W
sensor.solis_energy_today               # Sản lượng solar trong ngày, kWh
sensor.solis_daily_grid_energy_purchased # Điện mua từ lưới trong ngày, kWh
sensor.solis_daily_on_grid_energy       # Điện đẩy lên lưới trong ngày, kWh
sensor.solis_temperature                # Nhiệt độ inverter
Một điểm cần lưu ý là dấu của sensor.solis_power_grid_total_power phụ thuộc cách integration expose dữ liệu. Trong hệ của mình, giá trị âm nghĩa là đang lấy điện từ lưới. Ví dụ live state lúc kiểm tra:
sensor.solis_power_grid_total_power: -3980 W
sensor.solis_total_consumption_power: 4820 W
sensor.solis_ac_output_total_power: 840 W
sensor.solis_energy_today: 14.8 kWh
sensor.solis_temperature: 48.7 °C
Đưa dữ liệu vào Energy Dashboard
Home Assistant Energy Dashboard nên được cấu hình trước khi làm dashboard đẹp, vì nó giúp lưu statistic dài hạn.
Trong hệ của mình:
solar:
  stat_energy_from: sensor.solis_energy_today

grid:
  flow_from:
    stat_energy_from: sensor.solis_daily_grid_energy_purchased
  flow_to:
    stat_energy_to: sensor.solis_daily_on_grid_energy

battery:
  stat_energy_from: sensor.battery_discharged
  stat_energy_to: sensor.tong_sac_pin_luu_tru
Phần này có thể cấu hình trong UI: Settings -> Dashboards -> Energy.
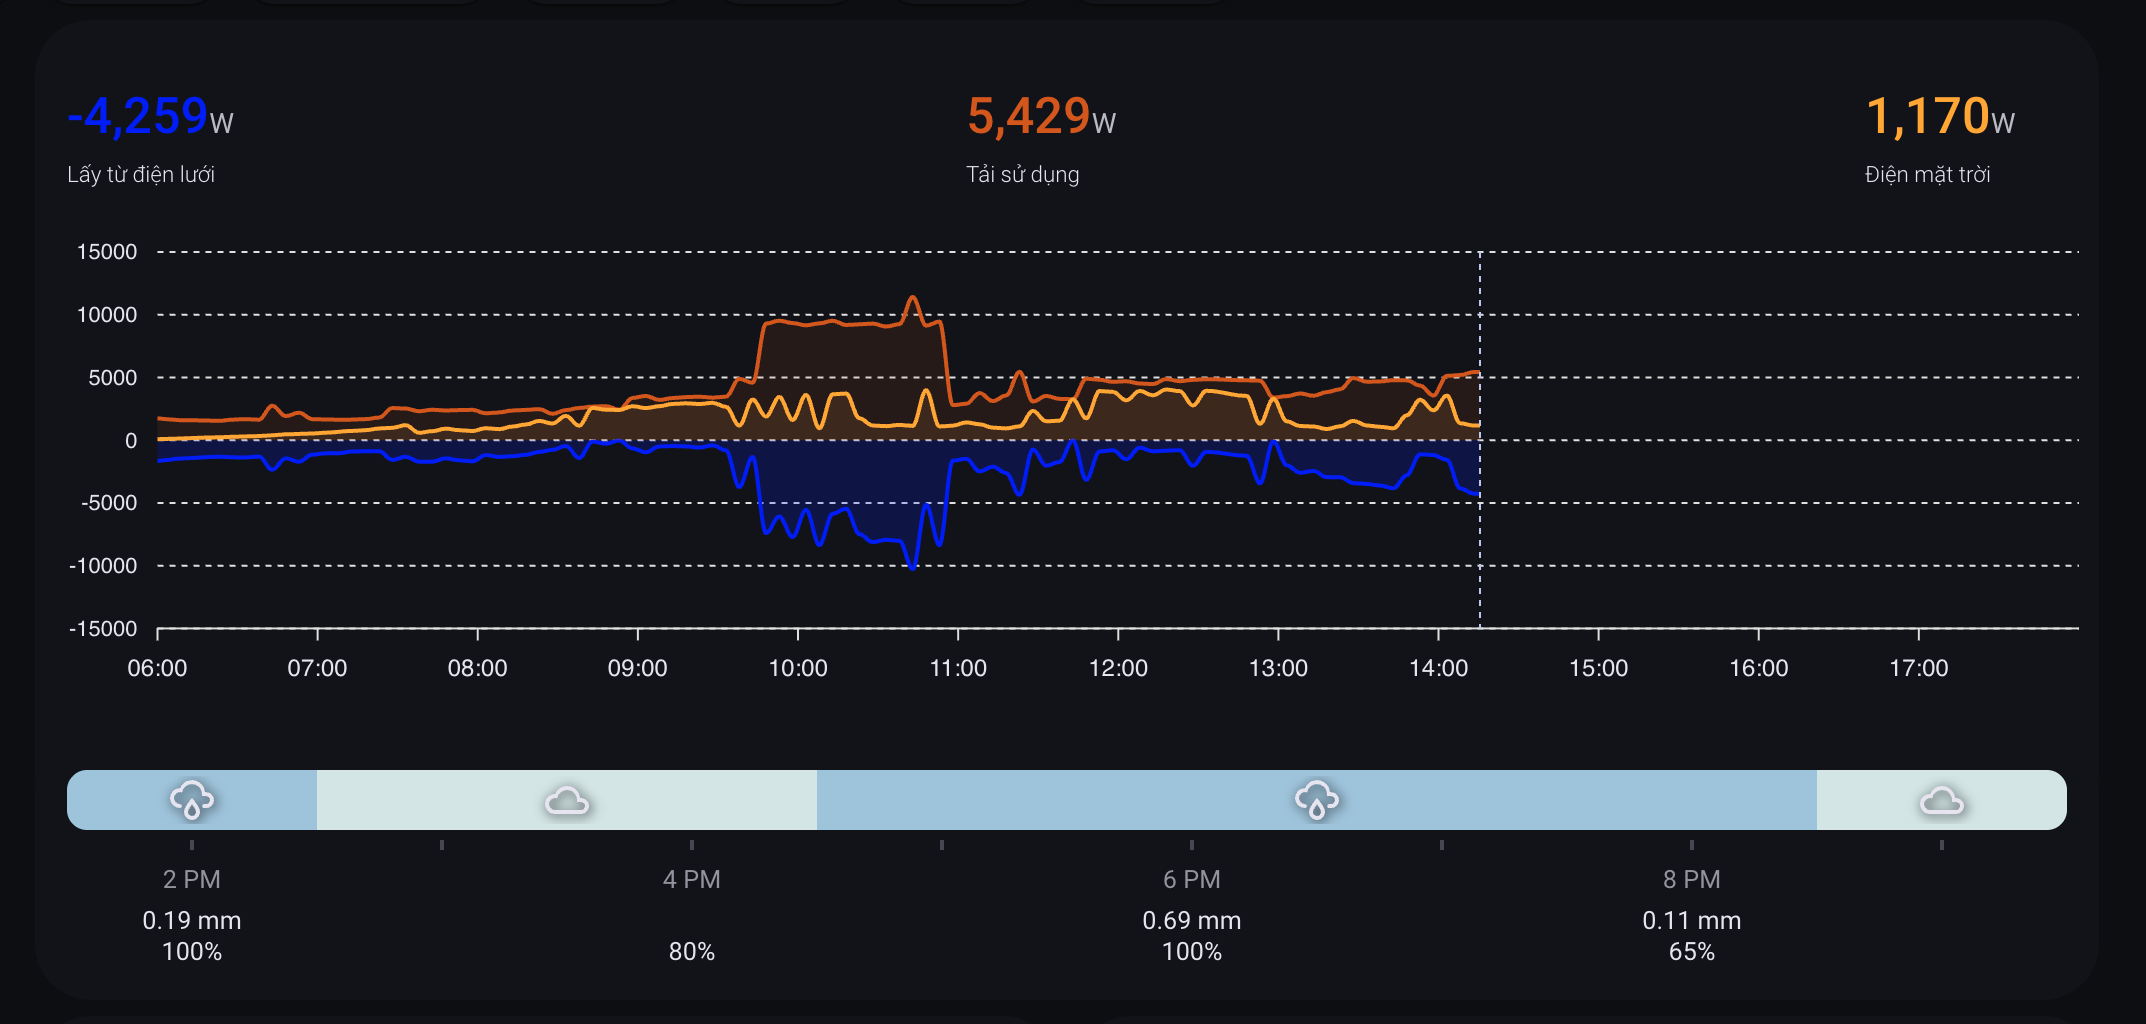
Card Lovelace giống màn hình trong ảnh
Card trong ảnh được ghép từ 2 custom card:
custom:apexcharts-cardđể vẽ 3 đường công suấtcustom:hourly-weatherđể hiển thị dải dự báo mưa/nắng theo giờ
Các resource đang được Home Assistant load qua HACS:
/hacsfiles/apexcharts-card/apexcharts-card.js
/hacsfiles/lovelace-hourly-weather/hourly-weather.js
/hacsfiles/stack-in-card/stack-in-card.js
Đây là phiên bản rút gọn từ cấu hình thật:
type: custom:stack-in-card
mode: vertical
cards:
  - type: custom:apexcharts-card
    apex_config:
      legend:
        show: false
      chart:
        height: 250px
    header:
      show: true
      show_states: true
      colorize_states: true
    all_series_config:
      extend_to: now
      float_precision: 2
      stroke_width: 2
      opacity: 0.3
      type: area
    graph_span: 12h
    span:
      start: day
      offset: +6h
    hours_12: false
    now:
      show: true
      label: ''
    series:
      - entity: sensor.solis_power_grid_total_power
        name: Lấy từ điện lưới
        color: blue
        opacity: 0.1
        color_threshold:
          - value: -1
            color: blue
            opacity: 0.2
          - value: 1
            color: red
      - entity: sensor.solis_total_consumption_power
        name: Tải sử dụng
        color: '#d35400'
        opacity: 0.1
        float_precision: 0
      - entity: sensor.solis_ac_output_total_power
        name: Điện mặt trời
        color: orange
        opacity: 0.1

  - type: custom:hourly-weather
    entity: weather.openweathermap
    name: ''
    show_precipitation_probability: true
    show_precipitation_amounts: true
    hide_temperatures: true
    hide_hours: false
    round_temperatures: true
    icon_fill: single
    icons: true
    show_wind: 'false'
    show_date: 'false'
    num_segments: '8'
    colors:
      sunny: orange
      partlycloudy: lightyellow
      rainy: '#9EC4DD'
      cloudy: '#D3E5E4'
      exceptional: red
Điểm hay của layout này là biểu đồ công suất và dự báo thời tiết nằm sát nhau. Khi đường solar tụt trong khi thanh thời tiết báo mây/mưa, mình biết ngay lý do không phải inverter lỗi mà là bầu trời đang không ủng hộ.
Dữ liệu thời tiết
Mình dùng OpenWeatherMap trong Home Assistant. Các entity quan trọng:
weather.openweathermap
sensor.openweathermap_weather
sensor.openweathermap_cloud_coverage
sensor.openweathermap_rain
sensor.openweathermap_precipitation_kind
sensor.openweathermap_feels_like_temperature
sensor.openweathermap_humidity
Live state lúc kiểm tra:
weather.openweathermap: cloudy
sensor.openweathermap_cloud_coverage: 100 %
sensor.openweathermap_rain: 0 mm/h
sensor.openweathermap_weather: mây đen u ám
Với card hourly-weather, Home Assistant gọi forecast theo giờ từ weather.openweathermap. Một forecast mẫu:
- datetime: '2026-06-13T07:00:00+00:00'
  condition: rainy
  temperature: 33.4
  precipitation: 0.19
  precipitation_probability: 100
  cloud_coverage: 100
- datetime: '2026-06-13T08:00:00+00:00'
  condition: cloudy
  temperature: 33.0
  precipitation: 0
  precipitation_probability: 80
  cloud_coverage: 100
Đây là phần làm dashboard hữu ích hơn app inverter: app Solis cho biết inverter đang làm gì, còn Home Assistant cho biết mình nên làm gì tiếp theo trong ngày.
Automation thực tế nằm ở các cảm biến
Nhóm automation mình dùng không phải để "tự động hoá dashboard". Dashboard chỉ là mặt hiển thị. Giá trị thật nằm ở việc Home Assistant biến số liệu Solis thành tín hiệu vận hành:
- Nếu ban ngày vẫn mua EVN nhiều trong khi có nắng, hệ có thể cảnh báo đang dùng điện chưa hiệu quả.
- Nếu hệ đang dư công suất mặt trời đủ lâu, hệ nhắc hoặc bật các tải linh hoạt như sạc pin, sạc xe, máy giặt.
- Nếu inverter nóng và bắt đầu giảm hiệu suất, hệ tự bật quạt để hạ nhiệt nhanh rồi tắt khi nhiệt độ đã xuống.
Tận dụng điện dư theo điện mặt trời
Sau khi có sensor realtime, mình dùng automation để tận dụng điện dư. Ví dụ hệ đang có automation bật sạc pin khi nắng lên:
alias: Turn ON Charger when sun raise
trigger:
  - platform: numeric_state
    entity_id: sensor.solis_power_grid_total_power
    above: -100
    for: '00:03:00'
  - platform: time
    at: '10:00:00'
condition:
  - condition: time
    after: '07:30:00'
    before: '17:00:00'
  - condition: state
    entity_id: switch.battery_charger_switch_1
    state: 'off'
  - condition: numeric_state
    entity_id: sensor.battery_total_voltage
    below: 26.2
action:
  - service: switch.turn_on
    target:
      entity_id:
        - switch.battery_charger_switch_1
        - switch.powr_powr320
Automation ngược lại sẽ tắt sạc khi hệ bắt đầu kéo điện lưới quá lâu:
alias: Turn OFF Charger when sun down
trigger:
  - platform: numeric_state
    entity_id: sensor.solis_power_grid_total_power
    below: -700
    for: '00:10:00'
condition:
  - condition: state
    entity_id: switch.battery_charger_switch_1
    state: 'on'
  - condition: numeric_state
    entity_id: sensor.solis_power_grid_total_power
    below: -500
action:
  - service: switch.turn_off
    target:
      entity_id: switch.battery_charger_switch_1
Mấu chốt ở đây là phải có for. Không nên bật/tắt tải lớn chỉ vì một cú tụt nắng vài giây.
Kết hợp forecast để quyết định trong ngày
Realtime sensor trả lời câu hỏi: bây giờ có dư điện không?
Weather forecast trả lời câu hỏi khác: có nên tranh thủ chạy tải ngay không, hay chờ lát nữa?
Một helper đơn giản có thể viết như sau:
template:
  - sensor:
      - name: Solar Use Priority
        state: >
          {% set grid = states('sensor.solis_power_grid_total_power') | float(0) %}
          {% set pv = states('sensor.solis_ac_output_total_power') | float(0) %}
          {% set cloud = states('sensor.openweathermap_cloud_coverage') | float(100) %}
          {% set rain = states('sensor.openweathermap_rain') | float(0) %}

          {% if grid > -100 and pv > 1500 and cloud < 70 and rain == 0 %}
            high
          {% elif grid > -500 and pv > 800 %}
            medium
          {% else %}
            low
          {% endif %}
Sau đó automation cho các tải linh hoạt chỉ cần nhìn vào priority:
alias: Suggest flexible loads when solar is good
trigger:
  - platform: state
    entity_id: sensor.solar_use_priority
    to:
      - high
      - medium
condition:
  - condition: time
    after: '09:30:00'
    before: '15:30:00'
action:
  - service: notify.mobile_app_your_phone
    data:
      title: Có thể tranh thủ dùng điện mặt trời
      message: Hệ đang có nắng tốt. Có thể chạy máy giặt, sạc xe hoặc bật điều hòa.
Nếu muốn tự động bật thiết bị thật, nên thêm buffer công suất. Ví dụ tải 1500 W thì chỉ bật khi hệ dư khoảng 1800-2200 W và giữ ổn định ít nhất 10 phút.
Cảnh báo tiêu thụ điện chưa hiệu quả
Một nhóm automation khác là cảnh báo khi nhà đang tiêu thụ điện chưa hợp lý. Ví dụ điều hòa hoặc tải lớn đang làm hệ kéo EVN quá nhiều trong khi vẫn còn khung giờ có nắng:
alias: Gợi ý bật/tắt điều hòa (tối ưu năng lượng mặt trời)
trigger:
  - platform: numeric_state
    entity_id: sensor.solis_power_grid_total_power
    below: -2000
    for: '00:15:00'
  - platform: numeric_state
    entity_id: sensor.solis_power_grid_total_power
    above: -100
    for: '00:15:00'
condition:
  - condition: time
    after: '10:00:00'
    before: '16:00:00'
  - condition: state
    entity_id: person.your_person
    state: home
action:
  - choose:
      - conditions:
          - condition: numeric_state
            entity_id: sensor.solis_power_grid_total_power
            below: -2000
        sequence:
          - service: notify.mobile_app_your_phone
            data:
              title: Có thể cân nhắc tắt điều hòa
              message: Hệ đang kéo điện lưới khá cao trong hơn 15 phút.
      - conditions:
          - condition: numeric_state
            entity_id: sensor.solis_power_grid_total_power
            above: -100
        sequence:
          - service: notify.mobile_app_your_phone
            data:
              title: Có thể bật điều hòa
              message: Điện mặt trời đang gánh tải tốt, có thể tranh thủ làm mát nhà.
Mình thích để nhóm này ở dạng cảnh báo/gợi ý trước, chưa tự bật/tắt điều hòa hoàn toàn. Thiết bị công suất lớn nên có một lớp xác nhận của người dùng, trừ khi đã hiểu rất rõ thói quen vận hành trong nhà.
Làm mát inverter
Một automation nhỏ nhưng thực dụng là bật quạt khi inverter nóng. Solis không có quạt tích hợp bên trong để tránh ồn, nên khi nhiệt độ cao inverter có thể giảm hiệu suất. Gắn thêm quạt ngoài và để Home Assistant bật/tắt theo nhiệt độ giúp hạ nhiệt nhanh mà không phải để quạt chạy cả ngày:
alias: Làm mát Inverter điện mặt trời
trigger:
  - platform: numeric_state
    entity_id: sensor.solis_temperature
    above: 60
  - platform: numeric_state
    entity_id: sensor.solis_temperature
    below: 45
action:
  - choose:
      - conditions:
          - condition: numeric_state
            entity_id: sensor.solis_temperature
            below: 60
        sequence:
          - service: fan.turn_off
            target:
              entity_id: fan.quat_lam_mat_switch_1
      - conditions:
          - condition: numeric_state
            entity_id: sensor.solis_temperature
            above: 45
        sequence:
          - service: fan.turn_on
            target:
              entity_id: fan.quat_lam_mat_switch_1
Ở đây có thể tinh chỉnh lại thành bật trên 60 độ, tắt dưới 45 độ để có hysteresis rõ ràng hơn, tránh quạt nhảy liên tục quanh một ngưỡng.
Báo cáo cuối ngày bằng AI
Một đoạn thú vị khác là dùng conversation.process để viết báo cáo điện năng cuối ngày. Input gồm:
sensor.solis_energy_today: sản lượng solarsensor.evn_sun_hours_energy_today: số điện EVN mua trong khung giờ có nắngweather.openweathermap: thời tiết ngày mai
Ý tưởng prompt:
action: conversation.process
data:
  agent_id: conversation.your_ai_agent
  language: vi
  text: >
    Bạn là quản gia năng lượng khó tính.

    Dữ liệu:
    1. Solar: {{ states('sensor.solis_energy_today') | float(0) | round(1) }} kWh
    2. Mua EVN giờ có nắng: {{ states('sensor.evn_sun_hours_energy_today') | float(0) | round(1) }} kWh
    3. Thời tiết ngày mai: {{ states('weather.openweathermap') }}

    Viết báo cáo ngắn bằng tiếng Việt.
    Nếu ban ngày mua EVN nhiều thì nhắc nên dời tải sang lúc có nắng.
Đây là phần mình thấy đáng tiền nhất của Home Assistant: không chỉ hiển thị dữ liệu, mà còn biến dữ liệu thành lời nhắc vận hành mỗi ngày.
Cách kiểm tra khi cấu hình xong
Vào Developer Tools -> States và kiểm tra:
sensor.solis_power_grid_total_power
sensor.solis_total_consumption_power
sensor.solis_ac_output_total_power
sensor.solis_energy_today
weather.openweathermap
sensor.openweathermap_cloud_coverage
sensor.openweathermap_rain
Nếu card không hiện:
- Kiểm tra HACS đã tải
apexcharts-card,hourly-weather,stack-in-card. - Vào Settings -> Dashboards -> Resources xem JS resource đã load chưa.
- Kiểm tra entity ID có đúng với hệ của bạn không.
- Nếu Solis sensor bị
unknown, kiểm tra lại SolisCloud credential và log của integration. - Nếu forecast không có xác suất mưa, thử gọi service
weather.get_forecastsvới typehourly.
Kết luận
App inverter thường chỉ trả lời câu hỏi hệ đang phát được bao nhiêu. Home Assistant cho mình một lớp cao hơn: nhà đang dùng điện như thế nào, thời tiết sắp tới ra sao, và nên vận hành tải nào trong khung giờ nắng.
Với một dashboard như trên, mình có thể nhìn vào một màn hình để quyết định:
- Có nên bật sạc pin không
- Có nên tranh thủ chạy máy giặt/sạc xe không
- Có nên giảm/tắt tải lớn vì đang kéo EVN quá nhiều không
- Inverter có đang nóng cần bật quạt không
Đây là bước chuyển từ "xem số liệu điện mặt trời" sang "vận hành nhà theo điện mặt trời": card giúp mình nhìn và lên kế hoạch, còn automation dùng chính các sensor đó để cảnh báo, tận dụng điện dư và bảo vệ hiệu suất inverter.