
WireHole-UI: All-in-one WireGuard VPN and Ad-blocking DNS
I was looking for a solution that allows me to both connect via WireGuard VPN and use an ad-blocker to avoid being annoyed while browsing the web.
Let me introduce WireGuard-UI – an all-in-one solution: WireGuard VPN + ad-blocking DNS
I. Introduction to WireHole-UI
WireHole-UI is a fork I created based on the original version WireHole – a tool that combines WireGuard + Pi-Hole + Unbound running on Docker-Compose to create a VPN Server (WireGuard) that has ad-blocking capability (via Pi-Hole*) and optimized DNS security (via Unbound).
* Pi-Hole is a DNS-based ad-blocking solution similar to Adguard Home.
I replaced Linuxserver’s WireGuard Docker image with the WireGuard image from wg-easy so WireGuard can be configured more easily through a Web UI.
Instead of having to individually set up wg-easy, Pi-Hole, and Unbound and configure all three to work together, WireHole-UI automates everything through a single docker-compose.yml file. You just need to download it, change a few parameters, and start it with the command docker-compose up -d, and you’re done.
Features
- All-in-one tool: WireGuard + Web UI (wg-easy) + Ad-blocking (Pi-Hole) + DNS Caching (Unbound)
- Easy to install, easy to use.
- User-friendly interface, quickly create, edit, and delete clients.
- QR Code support for connecting clients using a phone
- Supports Split-Tunnel: only use the ad-blocking feature when connected via VPN
II. Installing WireHole-UI
I recommend installing WireHole-UI on Ubuntu 20.04 for best compatibility. If you are using Ubuntu 18.04, you need to update the Linux kernel to the latest version before you can use WireGuard.
sudo apt-get install --install-recommends linux-generic-hwe-18.04
1. Install Docker & Docker-Compose
WireHole-UI runs on Docker-Compose. Therefore, you need to install Docker before getting started.
2. Install git
Install git on your machine if it’s not already available
sudo apt install git
3. Download WireHole-UI
git clone https://github.com/10h30/wirehole-ui.git
cd wirehole-ui
4. Configure parameters
Before starting WireHole-UI, you need to edit a few parameters in the docker-compose.yml file
nano docker-compose.yml
The default content of docker-compose.yml is as follows
version: "3"

networks:
  private_network:
    ipam:
      driver: default
      config:
        - subnet: 10.2.0.0/24

services:
  unbound:
    image: "klutchell/unbound"
    container_name: unbound
    restart: unless-stopped
    hostname: "unbound"
    volumes:
      - "./unbound:/opt/unbound/etc/unbound/"
    networks:
      private_network:
        ipv4_address: 10.2.0.200

  wg-easy:
    depends_on: [unbound, pihole]
    environment:
      # ⚠️ Required:
      # Change this to your host's public address
      - WG_HOST= my.ddns.net

      # Optional:
      - PASSWORD=10h30
      # - WG_DEVICE=eth+
      - WG_PORT=51820
      - WG_DEFAULT_ADDRESS=10.6.0.x
      - WG_DEFAULT_DNS=10.2.0.100
      # - WG_ALLOWED_IPS=192.168.15.0/24, 10.0.1.0/24

    image: weejewel/wg-easy
    #image: weejewel/wg-easy:nightly
    container_name: wg-easy
    volumes:
      - .:/etc/wireguard
    ports:
      - "51820:51820/udp"
      - "51821:51821/tcp"
    restart: unless-stopped
    cap_add:
      - NET_ADMIN
      - SYS_MODULE
    sysctls:
      - net.ipv4.ip_forward=1
      - net.ipv4.conf.all.src_valid_mark=1
    dns:
      - 10.2.0.100 # Points to pihole
      - 10.2.0.200 # Points to unbound

    restart: unless-stopped
    networks:
      private_network:
        ipv4_address: 10.2.0.3

  pihole:
    depends_on: [unbound]
    container_name: pihole
    image: pihole/pihole:latest
    restart: unless-stopped
    hostname: pihole
    dns:
      - 127.0.0.1
      - 10.2.0.200 # Points to unbound
    environment:
      TZ: "Asia/Hong_Kong"
      WEBPASSWORD: "" # Blank password - Can be whatever you want.
      ServerIP: 10.2.0.100 # Internal IP of pihole
      DNS1: 10.2.0.200 # Unbound IP
      DNS2: 10.2.0.200 # If we don't specify two, it will auto pick google.
    # Volumes store your data between container upgrades
    volumes:
      - "./etc-pihole/:/etc/pihole/"
      - "./etc-dnsmasq.d/:/etc/dnsmasq.d/"
    # Recommended but not required (DHCP needs NET_ADMIN)
    #   https://github.com/pi-hole/docker-pi-hole#note-on-capabilities
    cap_add:
      - NET_ADMIN
    networks:
      private_network:
        ipv4_address: 10.2.0.100
There are two parameters you must change:
- WG_HOST= my.ddns.netChange this to the public IP of the server you use. If you are setting this up at home, you can use Dynamic DNS.- PASSWORD=10h30This is the password used to access the WireGuard Web UI viahttp://<IP-Address>:51821. Change it to improve security.
You can keep the other parameters unchanged if you are not familiar with Docker.
After editing, save (CTRL + O) and exit (CTRL + X).
Note: If you are using an Oracle Cloud VPS and cannot access the Internet after connecting to WireGuard, refer to this article to fix it
5. Start WireHole-UI
Start WireHole-UI with the following command
docker-compose up -d
Wait a few minutes for the machine to download the Docker images and set up the containers. After completion, you can access the following address to configure WireGuard clients. Log in with the password you set in the – PASSWORD section of the docker-compose.yml file
http://<IP-Address>:51821
If you are setting this up on a free Oracle VPS, refer to this article for more detailed instructions
III. Connecting to WireHole-UI
1. Create a WireGuard Client
To connect to the WireGuard VPN Server, you need to access the Web UI to create a client.
http://<IP-Address>:51821
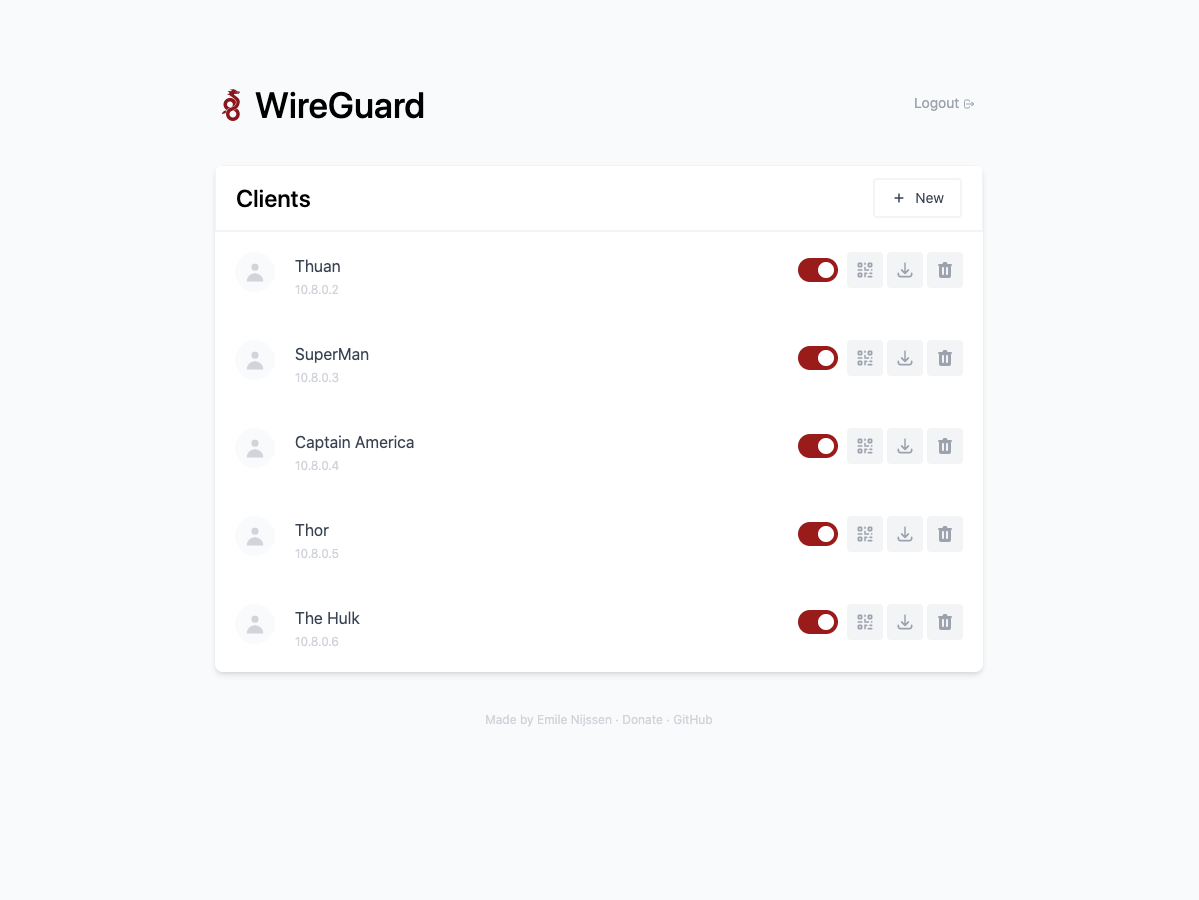
The Web UI for managing WireGuard is extremely user-friendly and easy to use.
- Click New to create a client.
- Click the QR icon to view the QR code for setting up the WireGuard client on your phone.
- Click the Download icon to download the configuration file, which is used to set up the WireGuard client on your computer.
- Click the Trash icon to delete a client.
2. Install WireGuard Client
If you don’t know how to set up a WireGuard Client, refer back to the WireGuard Client installation section in this article
3. Configure Pi-Hole
By default, after successfully connecting to the WireGuard VPN Server, ads will automatically be blocked thanks to Pi-Hole’s operation, and you do not need to configure anything else.
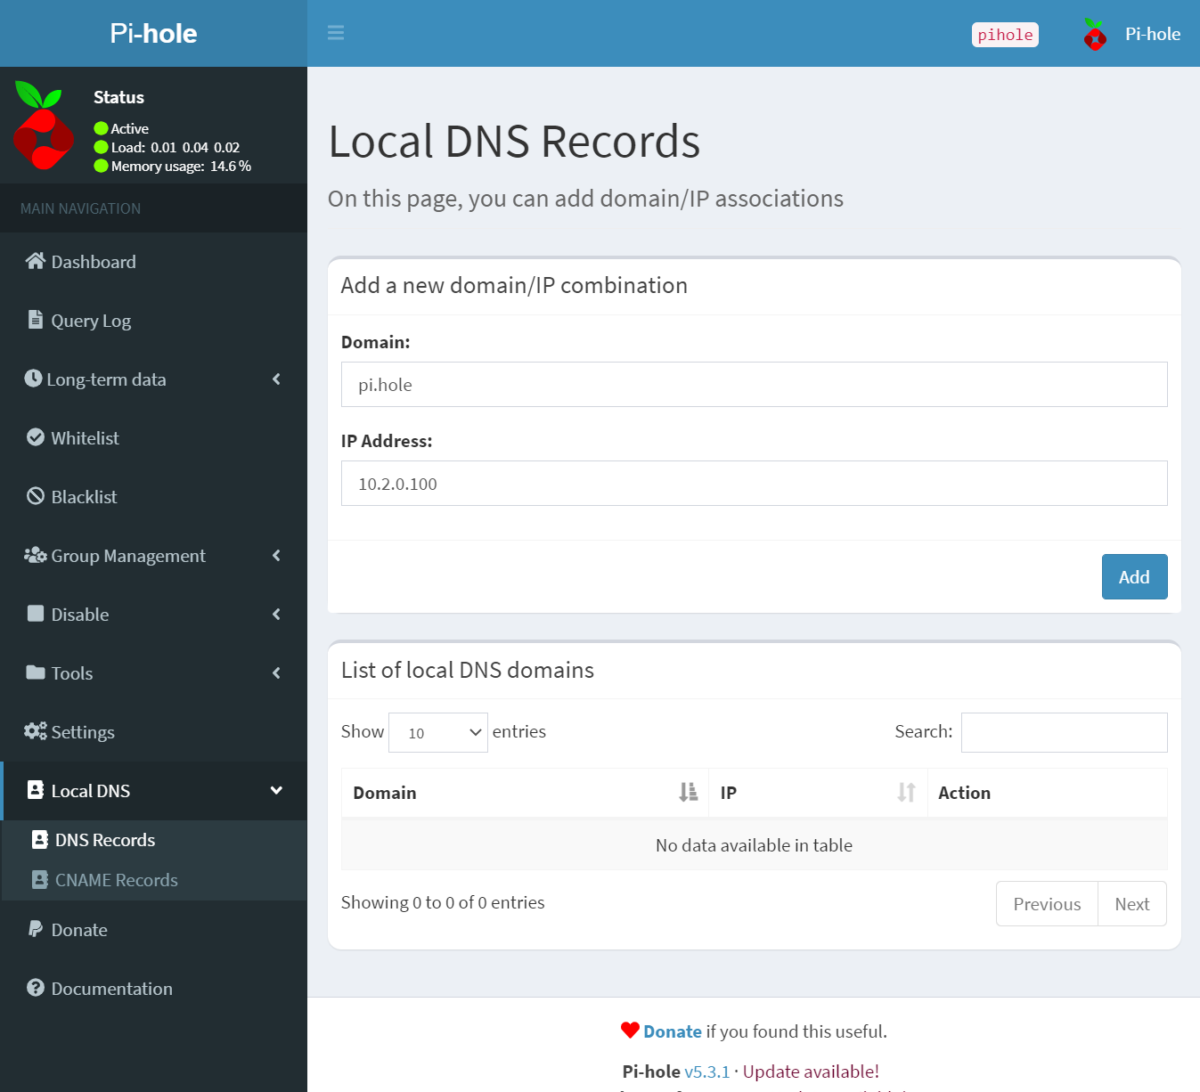
If you want to configure Pi-Hole more advanced, you can access the Pi-Hole Dashboard at the following address
http://10.2.0.100/admin
Typically, I add Local DNS Records so that later I can access Pi-Hole via the domain http://pi.hole for easier recall.
Go to the DNS Records section, create a new entry:
- Domain: pi.hole
- IP Address: 10.2.0.100
Then click Save and you’re done
IV. Configure Split-Tunnel
WireHole-UI has an additional Split-Tunnel feature that is very useful in case you only want to make use of Pi-Hole’s DNS Server for ad-blocking without routing your traffic through the VPN Server.
The procedure is very simple. You just need to create another WireGuard client, for example: Adblock, and download the configuration file Adblock.conf to your machine.
Then, when configuring on the WireGuard client, change the AllowedIPs line to 10.2.0.0/24 and save.
[Interface]
PrivateKey = xxxxxxxxxxxxxxxxxxxxxxxxxxxxxxxxxxxxxxxx
Address = 10.6.0.2/24
DNS = 10.2.0.100

[Peer]
PublicKey = yyyyyyyyyyyyyyyyyyyyyyyyyyyyyyyyyyyyyyyyyyy
PresharedKey = zzzzzzzzzzzzzzzzzzzzzzzzzzzzzzzzzzz
AllowedIPs = 10.2.0.0/24
Endpoint = aaa.bbb.ccc.ddd:5182
With this configuration, only DNS traffic is routed through the VPN Server, while your web traffic still works normally without going through the VPN.
Good luck with your installation!