Mini Webserver - Turn An Old PC Into A Home Server
Turn an old PC into a practical home server: run Proxmox, separate services with VMs and containers, manage Docker, reverse proxy, backups, and keep the system more stable than installing everything directly on one OS.
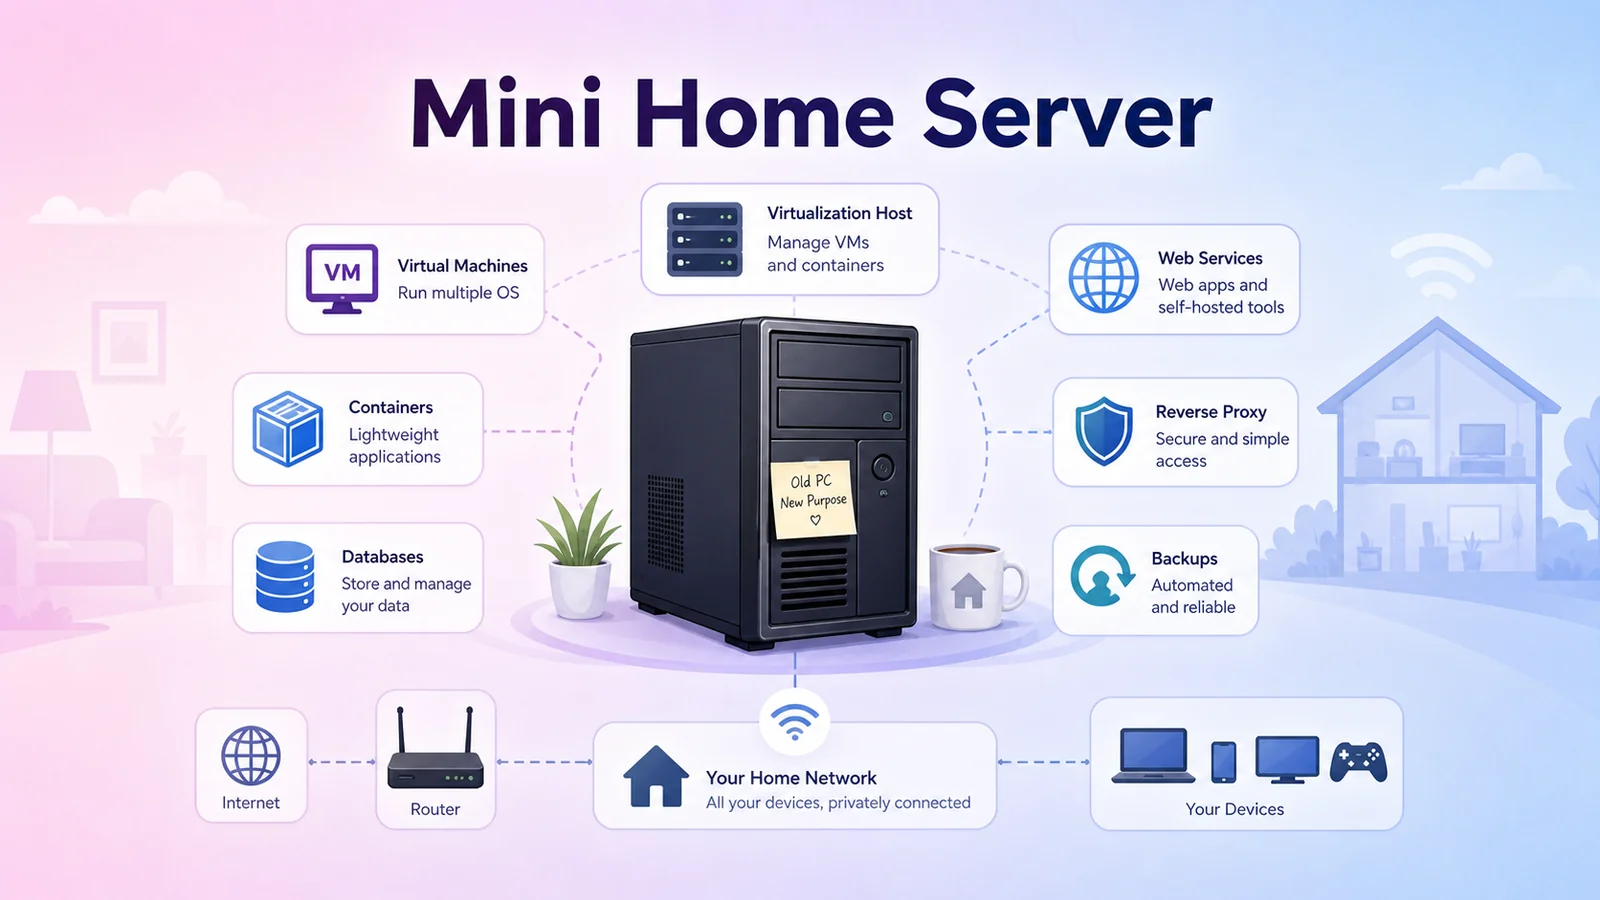
If you have an old PC that is rarely used, or a desktop that still has decent hardware but only gets powered on occasionally, you can turn it into a home server. The goal is not necessarily to replace every VPS. It is to have your own environment for personal services, experiments, storage, networking practice, and system operations.
At first, a few small containers may be enough. But if everything is installed directly on one operating system, the setup becomes messy quickly: services depend on each other, updating one thing can break another, and backup or restore becomes difficult.
The approach I prefer is to turn the old PC into a small virtualization host: install Proxmox on the physical machine, then split service groups into separate VMs or containers.
Why Use An Old PC As A Home Server?
An old PC usually has several advantages over a Raspberry Pi or a tiny mini-PC:
- A stronger CPU for running multiple services.
- RAM that can be upgraded when containers or VMs increase.
- Room for SSDs or HDDs for data, backups, media, and databases.
- Easier replacement of power supply, fans, drives, or network cards.
- No need to rent another VPS just to test personal services.
The tradeoffs are power usage, noise, and hardware reliability. If the machine is too old, consumes too much power, or has loud fans, measure real power draw before letting it run 24/7.
Goals For A Mini Home Server
For a home server, I usually define a few goals:
- Reuse existing hardware while still controlling resource usage.
- Separate important services so one failure does not take down everything.
- Make backup and restore easier when moving machines or fixing mistakes.
- Keep a safe place to test new services without polluting the stable environment.
- Allow gradual expansion: more RAM, more storage, more VMs, more containers.
Running Docker directly on Ubuntu or Debian still works. But once the number of services grows, adding a virtualization layer with Proxmox makes the system easier to manage.
Recommended Architecture
A simple starting structure is:
Internet / Router
        |
   Home Server
   Proxmox VE
        |
        +-- VM 1: Docker / Portainer
        +-- VM 2: Home Assistant or smart home services
        +-- VM 3: Database / web services
        +-- LXC: reverse proxy, monitoring, utility services
You do not need to split everything exactly like this from day one. The important rule is to keep clear boundaries. Important services, services with data, and services that are hard to restore should have their own area. Experimental services should live somewhere easy to delete.
Why Proxmox?
Proxmox is an open source virtualization platform that runs directly on physical hardware. After installation, you get a web interface for creating VMs, LXC containers, snapshots, backups, and resource monitoring.
What I like about Proxmox:
- Easy VM creation for testing new operating systems or stacks.
- Snapshots before risky updates.
- Per-VM/container backups instead of one huge whole-machine backup.
- CPU, RAM, and disk limits for each environment.
- Easier migration when hardware needs to be upgraded later.
For a home server, Proxmox is not the only choice, but it is practical if you want to learn virtualization and run multiple services on the same machine.
Services Worth Separating
You do not need to split too aggressively at first, but these groups are worth thinking about:
- Reverse proxy: Caddy, Nginx Proxy Manager, or Traefik for routing many services through domains/subdomains.
- Docker/Portainer: where self-hosted apps, dashboards, media tools, or automations run.
- Home Assistant / smart home: should stay stable and avoid being affected by unrelated experiments.
- Database: PostgreSQL, MySQL, or MariaDB should have clear backup rules.
- Monitoring: CPU, RAM, disk, temperature, uptime, and logs.
- Backup: important configuration and data should be copied to another disk or another machine.
This keeps maintenance less stressful. If an experimental app breaks, it should not affect Home Assistant or the reverse proxy used every day.
Problems You Will Meet When Self-Hosting At Home
Self-hosting at home is fun, but a few issues will definitely appear:
- Public IP and port forwarding: the router must be configured correctly, or you need a tunnel if there is no public IP.
- Reverse proxy: many services want ports 80/443, so a reverse proxy is needed to route by domain.
- Accessing public domains from inside the LAN: sometimes NAT loopback or internal DNS is needed.
- Backup: do not wait until something breaks before planning backups.
- Power and heat: a 24/7 machine needs clean airflow, stable power, and enough cooling.
- Security: do not expose services to the Internet without understanding authentication, firewall rules, and updates.
A home server is not just installing software. It is a small system that needs to be operated properly.
When Should You Upgrade?
You do not need to buy a powerful server at the beginning. Start with the hardware you already have, then upgrade when a real limit appears:
- RAM is often full.
- Storage is too slow or too small.
- Too many 24/7 services are competing for resources.
- You want a clearer split between testing and production.
- You need faster and safer backup/snapshot workflows.
For a beginner, an old PC with an SSD and 16-32GB RAM is already enough to learn a lot: Proxmox, Docker, reverse proxy, backup, monitoring, Home Assistant, databases, and a few personal web services.
Conclusion
Turning an old PC into a home server is a practical way to learn self-hosting. You can start small: run Home Assistant, launch a few containers, try reverse proxy, or host an internal web app. Once you understand the system better, you can decide whether hardware upgrades are actually needed.
The most important part is keeping the architecture clear: Proxmox as the virtualization layer, VMs and containers separated by service group, reverse proxy for access, and backups planned from the beginning. With that structure, an old PC is no longer just unused hardware in the corner. It becomes a small lab for real learning and real operations.