Set Up Essential Plugins for Home Assistant: VS Code, HACS, and Samba Share
To make it easier to follow and work with the guides on my blog, you need to set up a system of plugins right from the beginning. Keywords: home assistant, bms, ai.
To follow most Home Assistant tutorials comfortably, you should prepare a small set of basic tools first. These add-ons make it much easier to edit configuration files, install community integrations, and move files in and out of your Home Assistant machine.
This guide focuses on three essentials:
- Studio Code Server for editing YAML and Home Assistant configuration files.
- HACS for installing community integrations, dashboard cards, and themes.
- Samba Share for accessing Home Assistant folders from Windows or macOS.
Install Studio Code Server
Studio Code Server gives you a browser-based Visual Studio Code environment inside Home Assistant. It is useful when you need to edit files such as configuration.yaml, automations.yaml, scripts.yaml, or custom integration files.
Installation Steps
- Open Home Assistant.
- Go to Settings -> Add-ons -> Add-on Store.
- Search for Studio Code Server or Visual Studio Code.
- Open the add-on page and click Install.
- After installation, enable the options you need:
- Start on boot
- Watchdog
- Auto update
- Show in sidebar
- Click Start.
- Check the Log tab to confirm the add-on started correctly.
- Click Open Web UI to open the editor.
Using Studio Code Server
Once the add-on is running, open it from the sidebar or from the Open Web UI button. You should see your Home Assistant configuration folder in the left file explorer.
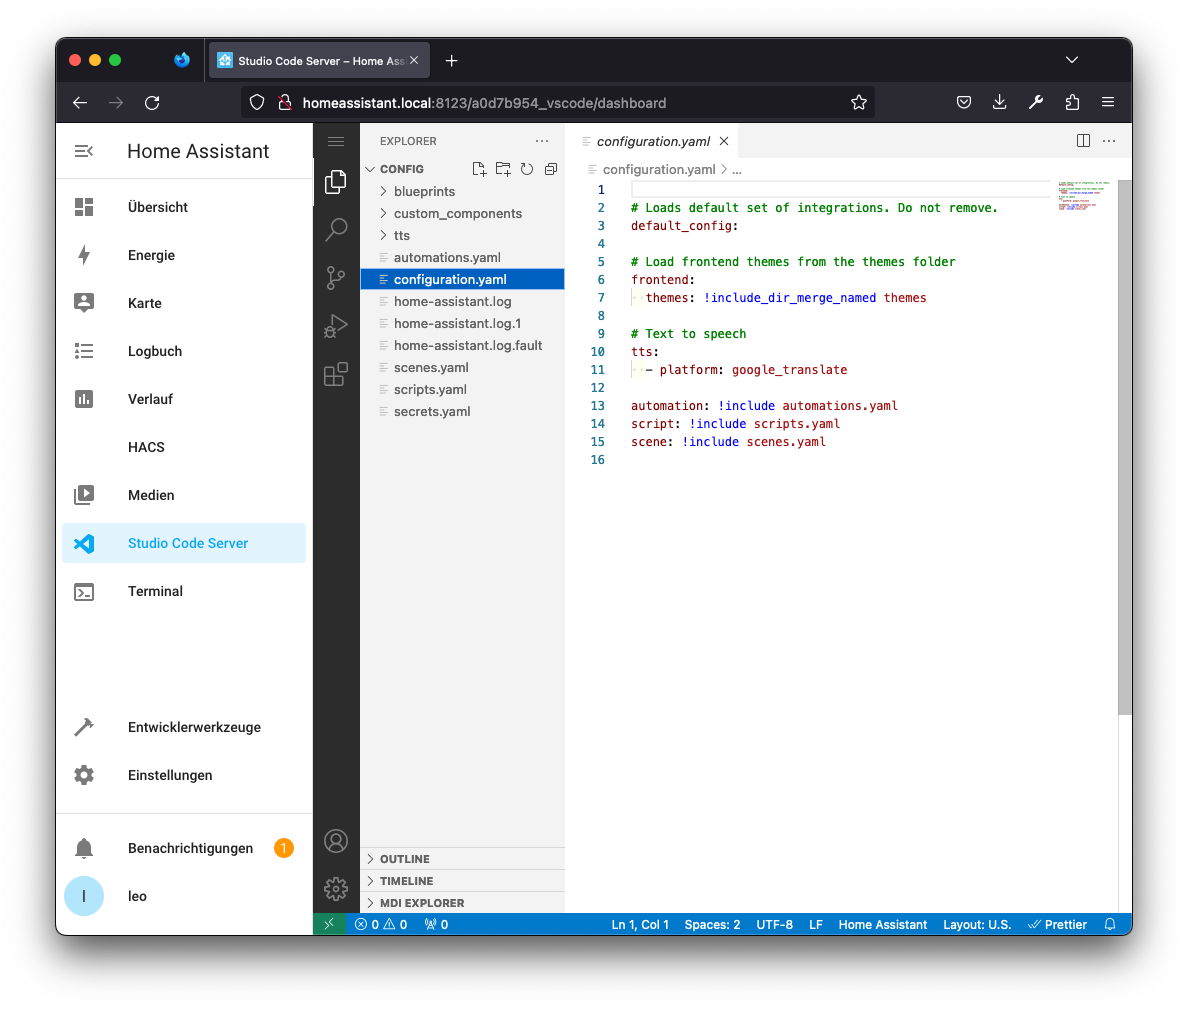
Common files you will edit:
configuration.yamlfor global YAML configuration.automations.yamlfor automations created or stored as YAML.scripts.yamlfor reusable scripts.scenes.yamlfor scene definitions.custom_components/for custom integrations installed manually.
If you only use Home Assistant through the visual UI, you may not edit these files every day. But once you start following more advanced tutorials, having a proper editor saves a lot of time.
Install HACS
HACS stands for Home Assistant Community Store. It is not part of the official Home Assistant core, but it is one of the most useful tools for people who want to install community integrations, frontend cards, themes, and experimental features.
Option 1: Install HACS With the Add-on Repository
If your Home Assistant setup supports add-ons, the easier path is:
- Go to Settings -> Add-ons -> Add-on Store.
- Open Manage add-on repositories.
- Add this repository:
https://github.com/hacs/addons
- Refresh the add-on store.
- Search for Get HACS.
- Install and run it.
- Restart Home Assistant when the installation is complete.
Option 2: Install HACS Manually
If the add-on method does not work, install HACS manually from the terminal inside Studio Code Server:
wget -O - https://get.hacs.xyz | bash -
Then restart Home Assistant:
- Go to Settings -> System.
- Choose Restart Home Assistant.
- Wait for Home Assistant to come back online.
Connect HACS to GitHub
After restarting:
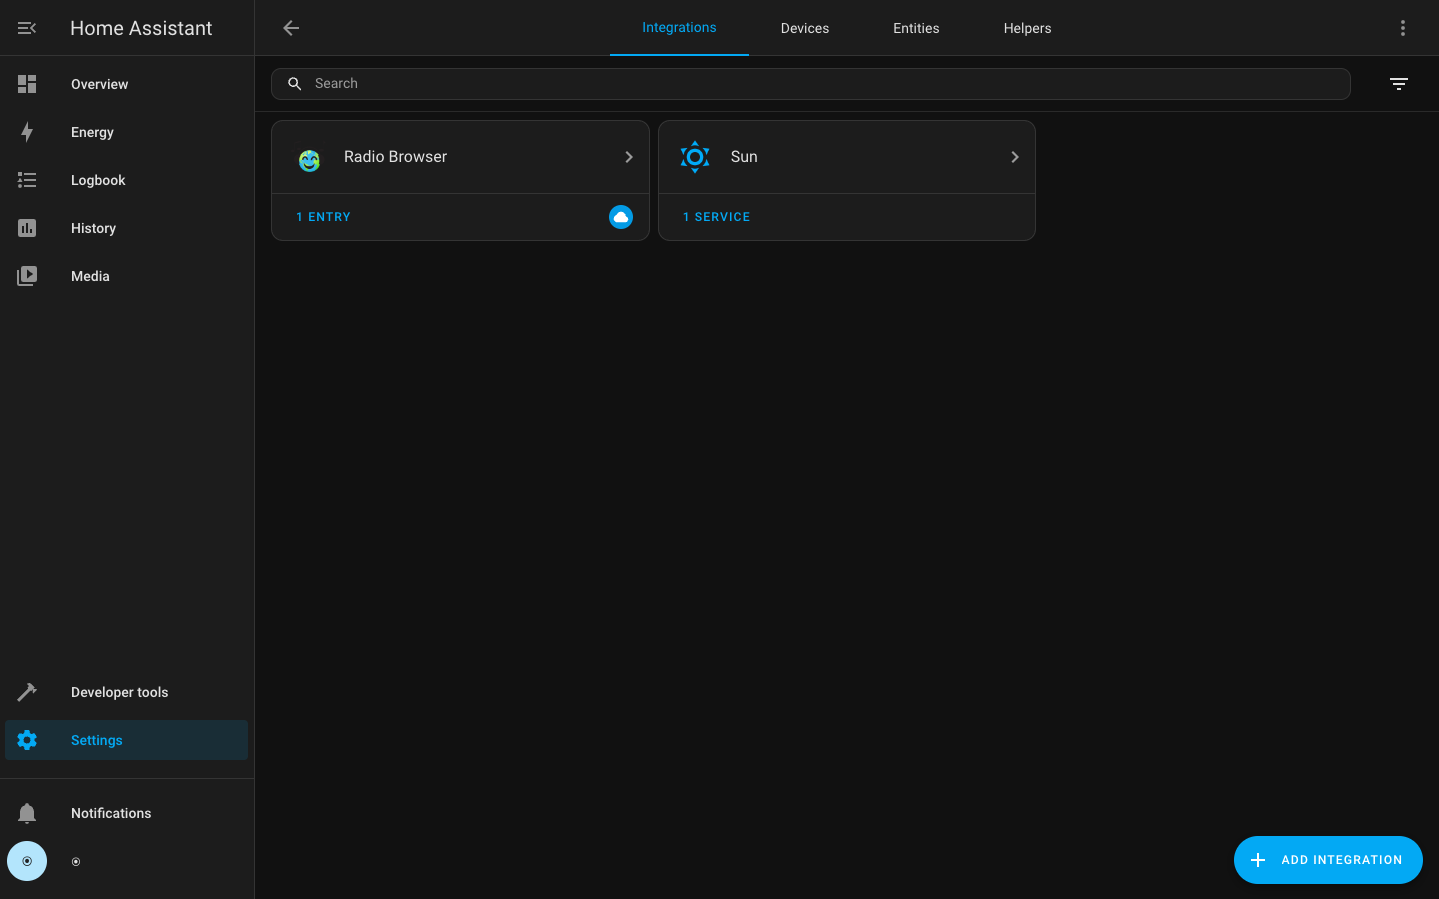
- Go to Settings -> Devices & services.
- Click Add integration.
- Search for HACS.
- Follow the GitHub authentication flow.
- Copy the device code shown by Home Assistant.
- Open the GitHub device login page.
- Enter the code and authorize HACS.

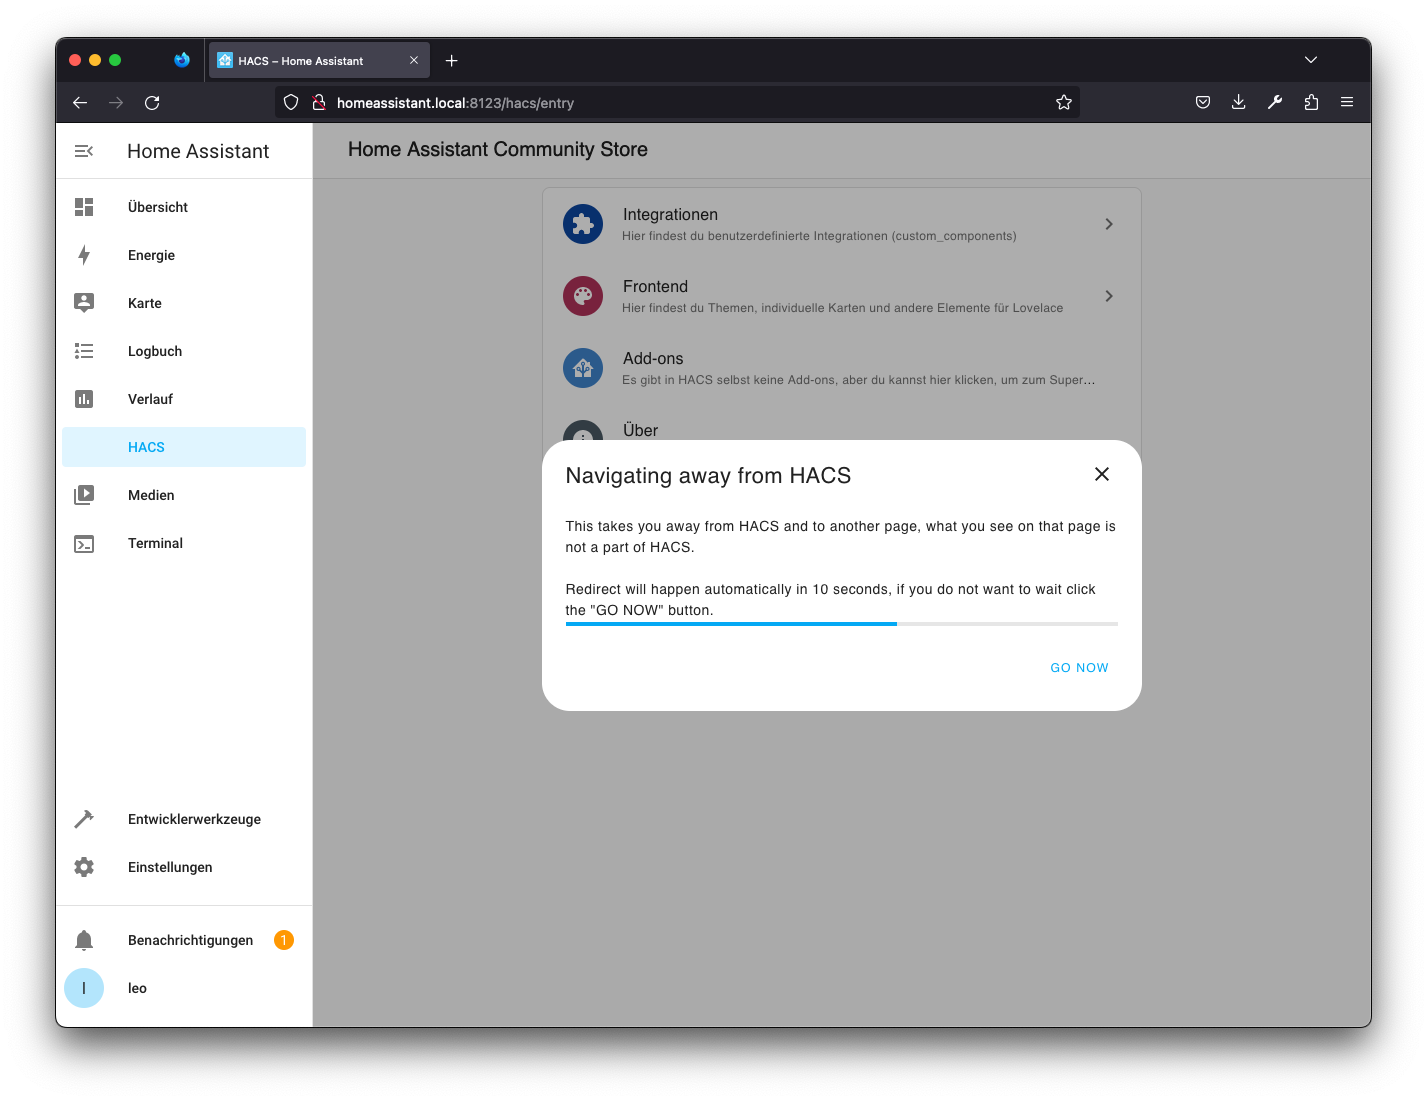
When the flow is complete, HACS will appear in the Home Assistant sidebar. From there, you can search for community integrations, Lovelace cards, and themes.
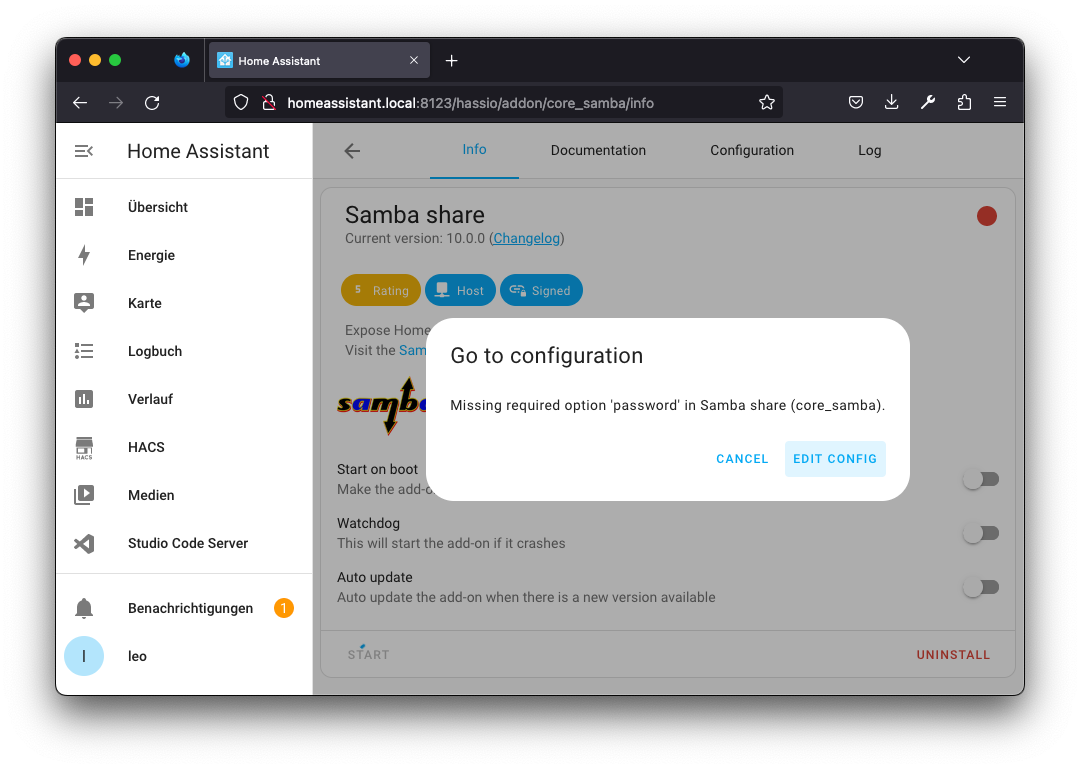
Install Samba Share
Samba Share lets you access Home Assistant folders from another computer on your local network. This is convenient when you want to copy files, back up configuration folders, or edit files with tools outside the browser.
Installation Steps
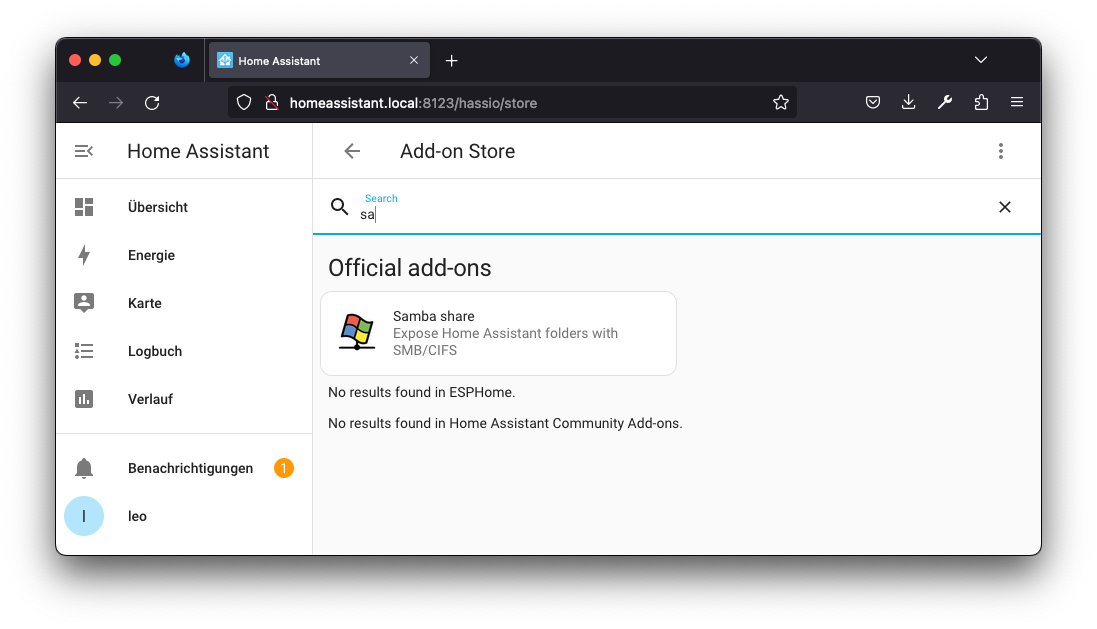
- Go to Settings -> Add-ons -> Add-on Store.
- Search for Samba Share.
- Open the add-on page.
- Click Install.
- Open the Configuration tab.
- Set a username and password for network access.
- Configure
allowed_hoststo match your home network. - Save the configuration.
- Start the add-on.
Example allowed_hosts values:
allowed_hosts:
  - 192.168.0.0/16
  - 172.16.0.0/12
Only allow the networks you actually use. Do not expose Samba Share directly to the Internet.
Access Samba Share From Windows
- Open This PC.
- Right-click Network or choose Map network drive from the toolbar.
- Enter the Home Assistant network path:
\\HOME_ASSISTANT_IP
- Select the folder you want to mount.
- Enter the username and password configured in the Samba Share add-on.
- Enable Remember my credentials if this is your own trusted computer.
Access Samba Share From macOS
- Open Finder.
- Click Go -> Connect to Server.
- Enter:
smb://HOME_ASSISTANT_IP
- Click Connect.
- Choose the shared folder.
- Enter the Samba username and password.
Recommended Setup Order
Install the tools in this order:
- Studio Code Server first, so you have a proper editor and terminal.
- HACS second, because many future Home Assistant tutorials depend on it.
- Samba Share third, so you can move files from your desktop when needed.
After that, your Home Assistant environment is ready for most smart home tutorials: editing YAML, installing custom components, adding dashboard cards, and managing files from another computer.
Safety Notes
- Do not publish Samba Share to the Internet.
- Use a strong Samba username and password.
- Keep HACS and installed custom integrations updated.
- Back up Home Assistant before installing many custom components.
- Be careful when editing YAML files: one indentation mistake can break a configuration reload.
Image Sources
- Studio Code Server and Samba Share screenshots: Home Assistant guide by Thomas Stuetz.
- HACS screenshots: HACS official documentation.