When `openclaw doctor --fix` Is No Longer Enough
If you are using OpenClaw and run into the situation where you execute openclaw doctor --fix many times, copy configuration from elsewhere, and it still fails in the end — then very likely the problem lies beyond what the built-in diagnostic tool can handle.
Problem: openclaw doctor --fix is not always enough
OpenClaw provides the command openclaw doctor --fix to automatically diagnose and fix configuration issues. This is a quick and convenient solution, but it has limits:
- It can only fix known errors. The doctor tool works via pattern matching — if your error is outside its predefined rules, it will ignore it or fix the wrong thing.
- It doesn’t understand your specific context. For the same config key, whether a value is valid depends on the provider you use, the model you choose, and how you set up Docker — the doctor tool cannot see the full picture.
- It may change too much or too little. I’ve seen cases where the doctor reset the config back to defaults, overwriting parts that were working fine — resulting in a more serious service failure than before.
Solution: open Claude Code in the OpenClaw directory
Instead of relying on the automatic tool, use Claude Code — open it directly in the directory that contains the OpenClaw configuration.
cd ~/openclaw   # or the directory where you installed OpenClaw
claude
When Claude Code starts here, it can directly read every file in the directory: openclaw.json, docker-compose.yml, runtime logs, AGENTS.md, .env — all the context needed to understand exactly what state the system is in.
This is the core difference: Claude Code reads the real files on your machine and understands your specific context — something openclaw doctor --fix cannot do.
A 7-step process to normalize configuration
Step 1: Read logs and config — don’t change anything yet
The first task is data collection. Ask Claude Code:
"Read all configuration files and OpenClaw startup logs in the current directory. Group recurring errors, identify the root cause of the failure, and propose an order of checks from most likely to least likely."
Claude Code will use Read, Grep, Glob to scan the real files, instead of guessing from a prompt.
Step 2: Cross-check with official documentation
After forming a hypothesis about the error, ask Claude Code to cross-check against the docs for the version you are running:
"Compare the current configuration with the official guide for the version in use. Point out the deviations and the impact level of each deviation."
Goals:
- Detect wrongly named config keys (renamed across versions).
- Detect fields that are syntactically valid but semantically wrong at runtime.
- Detect redundant configs that cause conflicts.
Step 3: Minimal changes only
Golden rule: every change must be justified by the logs; don’t touch parts that are working fine.
"Apply only the minimal changes needed to restore stable startup. For each change, specify what is changed, why it’s changed, and the risk if it’s not changed."
Claude Code will use Edit to directly modify the config files — you can see the exact line-by-line diff before approving.
Step 4: Configure a fallback model
After the service is stable, add a backup model to avoid downtime when the primary model fails:
- Primary model + at least 1 backup model.
- Clearly defined fallback priority order.
- Fallback conditions: timeout, quota exceeded, provider error.
- Test calls to each model after configuration.
Step 5: Standardize AGENTS.md
Many failures are not in Docker but in overly vague agent role descriptions. Ask Claude Code to review and standardize:
- Main agent acts as orchestrator and always receives user requests directly.
- Long/slow tasks are delegated to sub-agents.
- Sub-agents report checkpoints at each milestone.
- Main agent aggregates results and responds consistently.
Step 6: Verify after changes
Mandatory checklist after each round of changes:
- [ ] Service starts up stably after restart.
- [ ] No more recurring startup errors in the new logs.
- [ ] Primary model is callable.
- [ ] Fallback model is callable.
- [ ] Main agent → sub-agent flow follows the correct roles.
If it fails, go back to step 1 and read the new logs — do not roll back based on gut feeling.
Step 7: Repeat if needed
This process is a controlled loop: read logs → cross-check → minimal changes → verify. Each iteration is based on fresh data, not guesswork.
Ready-to-use master prompt
Open Claude Code in the OpenClaw directory and paste the following prompt:
"Goal: normalize the OpenClaw configuration for stable startup.
Please follow this order:
1) Read all logs and config in the current directory, identify the root cause.
2) Cross-check with the official documentation for the exact version.
3) Propose minimal changes to restore startup.
4) Apply the changes and explain each one.
5) Set up a fallback model (primary + backup).
6) Standardize AGENTS.md so the main agent orchestrates with the correct role.
7) Run the verification checklist and report the result for each item."
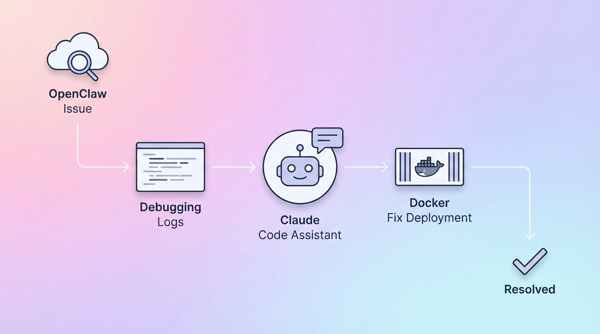
Conclusion
When openclaw doctor --fix no longer helps, don’t run it again. Open Claude Code right in the OpenClaw directory — let a tool that can read real files, see real logs, and precisely fix each config line handle it.
The core process is simple: read logs → cross-check → minimal changes → verify. Simple, but far more effective than describing errors over chat and hoping an agent will infer the rest.