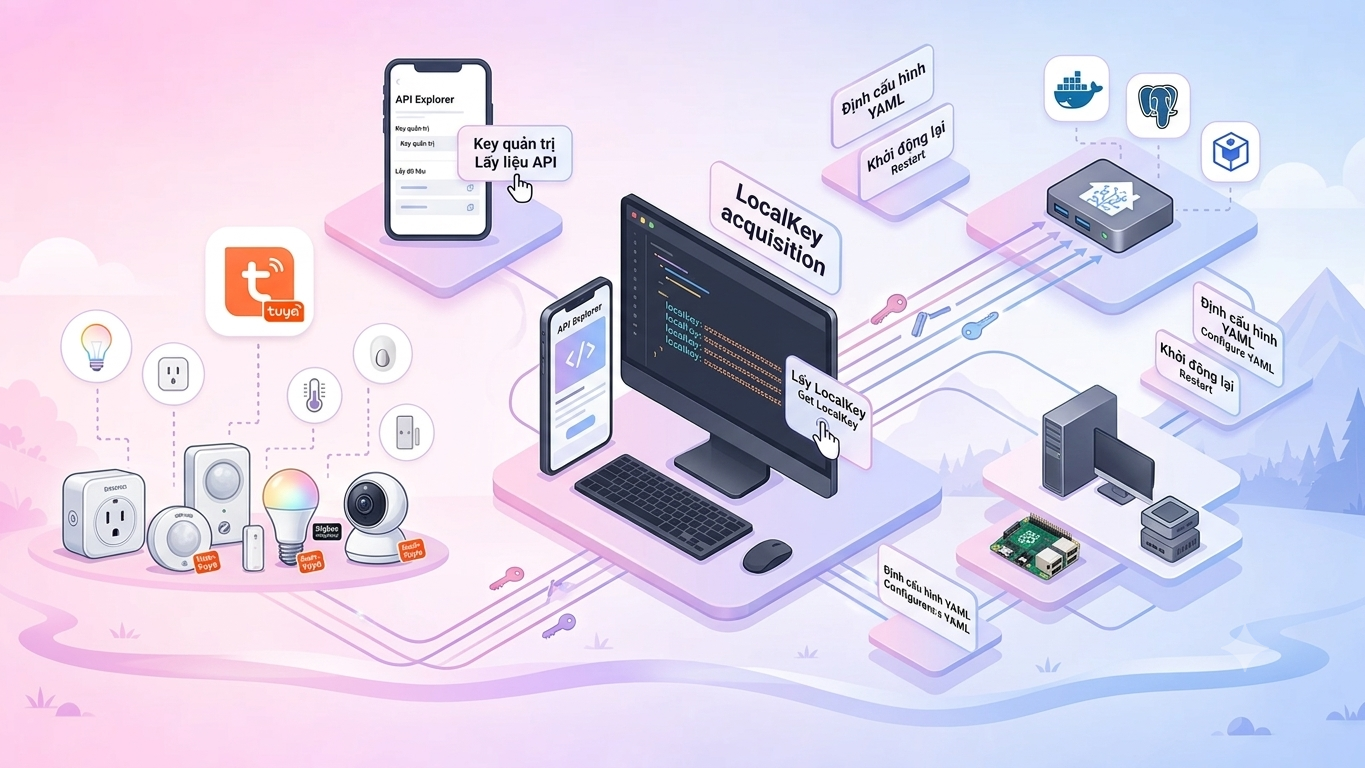
Adding Tuya Devices Not Supported by Cloud to Home Assistant via Tuya Local: How to Get the LocalKey
How to use the Tuya Local integration (make-all/tuya-local) to control Tuya devices over local WiFi when Tuya Cloud doesn't support them, plus 4 ways to get the LocalKey from easy to advanced.
Many devices using Tuya chips — lights, plugs, power sensors, clamp meters, energy meters, charging stations — when added to Home Assistant using the standard Tuya integration (cloud), fall into one of these scenarios: HASS doesn't recognize the device type (no entities, or empty/wrong entities), the datapoint (DP) model in the cloud is incomplete, missing important values, or simply relies on the internet connection, causing lag or device loss when Tuya Cloud is slow.
For such devices, the definitive solution is using Tuya Local: Home Assistant communicates directly with the device over local WiFi (Tuya protocol 3.3/3.4/3.5, encrypted with LocalKey), bypassing the cloud at the control layer. In my system, I am running 3 such devices: 2 clamp meters for EV charging stations (model pj1103_clamp_meter) and 1 two-way energy meter for the grid (model matsee_2way_energymeter) — the cloud didn't expose enough data I needed, so I switched to local connection.
Comparing Integrations
First, to be clear, there are 3 popular Tuya integrations in HASS:
| Integration | Source | Notes |
|---|---|---|
tuya |
core (standard HA) | Goes via Tuya Cloud; works well for most mapped devices |
localtuya |
rospogrigio/localtuya | Local-first, large community, manual configuration |
tuya_local |
make-all/tuya-local | Local-first, has cloud-assisted config flow to auto-fetch LocalKey; this is what I use |
make-all/tuya-local has iot_class: local_push — the device pushes state to HASS instead of HASS having to poll. The architecture is simple:
Device (WiFi Tuya)
      |
      | Tuya local protocol (3.3/3.4/3.5, AES + LocalKey)
      v
Home Assistant (tuya_local)
      |
      v
Entities: switch / sensor / number / climate / cover / fan / vacuum...

Tuya cloud: not involved in the control layer
(still receives background status from the device if it connects to cloud)
Three important notes before proceeding (from tuya-local docs):
- Each Tuya device usually only allows 1 local connection at a time. If the Tuya/SmartLife app is open on your phone, or another local integration is also connected to the same device, there will be a conflict.
- Local connection does not block the device from reporting status to the cloud — this is not a security measure, but an improvement in speed, reliability, and unlocking data that the cloud doesn't expose.
- Battery-powered devices (window sensors, smoke alarms...) without a hub cannot be done locally due to power-saving limits.
Installation
- Install HACS if you don't have it.
- In HACS, add the custom repository
https://github.com/make-all/tuya-local(category: integration) and install it. - Restart Home Assistant.
Getting the LocalKey — The Main Part of the Article
The LocalKey is a 32-character hex string used to encrypt/decrypt the device's local protocol. Each device has a key, and importantly: the key changes every time you re-pair the device with the app. There are 4 ways to get it, ranked from easy to hard.
Method 1: Cloud-Assisted Config (Easiest, Recommended)
The config flow of tuya_local has a cloud mode:
- Settings → Devices & Services → Add Integration → Tuya Local.
- Choose the cloud mode (or
cloud_fresh_loginif the old token has expired). - Log in with your Tuya/SmartLife account (standard app account) — no Tuya IoT developer account needed.
- Select the device in the list; the integration automatically fetches
device_id+local_key, and scans the LAN to fill in the IP. - Continue to Stage One (connection check) then Stage Two/Three as instructed below.
The cloud token only lasts a few hours, so the integration doesn't save it — convenient for adding multiple devices sequentially in one session. This method is also the safest route now, as Tuya has started time-limiting access to key data in the IoT developer portal (trial for about 1 month, can only refresh the trial every 6 months).
Method 2: Tuya IoT Developer Portal (Manual)
Requires an account on iot.tuya.com linked with the Tuya Smart/SmartLife app:
- Cloud → Devices: View the device list, note the Device ID. If you don't see the device, check that you have selected the correct server/region at the top of the page.
- Cloud → API Explorer → Devices Management → Query Device Details in Bulk → Enter the Device ID (separate multiple IDs with commas).
- The result returns the
local_key. - Get the device's IP from your router (preferably set a static IP first).
Method 3: tinytuya wizard (CLI)
tinytuya is the underlying library for these local integrations, with a wizard that does both device scanning and key retrieval:
pip install tinytuya
python -m tinytuya wizard
Answer the questions:
- API Key / API Secret: Get from iot.tuya.com (Access ID / Access Secret of your project).
- Device ID: Any device in your account (to pull the full list), or type
scanto scan the LAN. - Region: Select the correct data center for your account (US, EU, Central Europe...).
- Download DP Name mappings:
Y. - Poll local devices:
Y(if the device is on the same network as your HASS machine).
The result is in the devices.json file:
{
  "id": "xxxxxxxxxxxxxxxxxxxxxx",
  "key": "<local-key-32-hex>",
  "ip": "192.168.1.64",
  "node_id": "<node-id-of-sub-device (none if not a hub)>",
  "mapping": { "dps": "..." }
}
node_id is required for sub-devices (Zigbee/BT running through a Tuya hub). The mapping part is very useful when the device is not yet in the integration's database — you have enough DP info to declare a new device yourself or submit a PR to the repo.
Method 4: Traffic Sniffing (Advanced, Final Fallback)
The Tuya app communicates with the device via MQTT; when the app pairs/syncs the device, the LocalKey appears in the traffic. You can capture it using MQTT sniffing tools (web browser extension TuyaLocalKey or community tools), or use tuya-device-config (Tuya's official SDK running on their sandbox). This method is only needed when the above 3 methods are not feasible, for example when the device is in a cloud account you don't have data access to.
Signs of a wrong LocalKey: with protocol 3.1, the setup still "succeeds" because the key is only used when sending commands — you only notice when trying to toggle. With protocol 3.3 and above, the key is used to decrypt data, so the setup will fail immediately — which is a good signal, knowing early that the key is wrong.
Adding the Device to Home Assistant
Once you have host (IP), device_id, and local_key:
Stage One — Connection. Fill in 4 fields:
| Field | Value |
|---|---|
| host | Static IP of the device (e.g., 192.168.1.64) |
| device_id | Device ID from the methods above |
| local_key | 32-character hex string |
| protocol_version | auto (or 3.4/3.5 if you know it) |
The integration tries to connect and reads the actual DPS (datapoints) from the device before proceeding.
Stage Two — Device Type. The list is filtered from a database of thousands of devices, keeping only those that match the actual received DPS. Select the correct model — because if you choose wrong, you have to delete the entry and add it again (each device type creates a different set of entities, so it's not advisable to "change" the type in place). If your model is not in the list, the integration's log (WARNING level during setup) will print the list of received DPS — use it to declare a new device, or submit an issue/PR to the repo.
Stage Three — Naming. This name is the base for entity names; for multiple devices of the same type (e.g., multiple clamp meters), you should name them distinctly like Minh Home, EV Charging Station.
Common Issues
- Wrong key after re-pairing: Every time you re-pair with the app, the LocalKey changes. Update the config entry with the new key.
- Protocol misdetection: Some 3.2/3.22 devices are detected as 3.3 (or vice versa). Signs: state is readable but control is unstable. Fix: manually set protocol_version in options.
- Device "shuts down" when cloud is lost: Some devices stop responding if they can't connect to Tuya servers for a long time. Tip: block both DNS and TCP to Tuya for a "cleaner" offline mode (if you really want to run fully offline).
- Rate limit / device hangs: Tuya devices often cannot handle rapid successive commands — they may reboot or go offline for 30s to a few minutes. In automations, add delays between commands; group multiple attributes into one command (e.g.,
light.turn_onwith multiple attributes) if the device supports it. - Local connection conflicts: Close the Tuya/SmartLife app on your phone (or prevent the app from local access), and do not run 2 local integrations at the same time on the same device.
- Devices via hub: Use the
device_id/host/local_keyof the hub, plus thenode_idof the sub-device. The number of sub-devices is limited by the hub's connections (usually 1–3). If the hub is Zigbee, consider using ZHA or Zigbee2MQTT directly, which is cleaner. - Filling in "Auto" IP: Dynamic discovery works but is unreliable — fails when another integration is holding the local connection, or if the network has multiple subnets. Prefer a static IP in the router, which is faster for reconnection and more stable.
When to Still Use Tuya Cloud?
- The device is correctly mapped by the cloud and has enough entities for your needs — no need to add local for what.
- You need to control from outside the local network (local needs tunnel/VPN; cloud is ready for remote).
- The device has cloud-only features (some presets, firmware OTA via cloud).
My practical tip: running both cloud and local in parallel on one device is fine (cloud does not use local connection, so no conflict) — cloud as backup and remote, local as the main control path. Just need the rule: one local integration per device.
Conclusion
When a Tuya device is "not supported" in Home Assistant, most of the issue lies at the cloud layer (DP model not mapped, cloud doesn't expose enough data). Running local with make-all/tuya-local solves almost all of it, and the hardest step — getting the LocalKey — now has a cloud-assisted path right in the config flow, no developer account needed. Two things to remember before starting: set a static IP for the device, and close the Tuya/SmartLife app on your phone to avoid local connection conflicts.